Learn how to create, schedule, import, track and read scans and their results
Autobahn enables you to regularly scan your systems and aggregate vulnerability results from other tools into the Autobahn platform. All created scans, as well as integrated results from other tools, are displayed on the Scanning page. This article will guide you on how to import vulnerability scans from other tools, track created scans, and assign your scans.
This feature is only available for users with Admin and Owner roles.
Table of content
- Create a scan
- Import asset/issue data from other sources
- View all scans and vulnerability reports
- Understand scan statuses
- Assign scans
- Change scan configuration
- Re-scan the targets
- Customize the All scans table
1. Create a scan
Autobahn empowers you to proactively safeguard your infrastructure from potential threats by creating a scan. Click the Create a Scan button on the Scanning page to open the Scan Creation page.
Read this article to learn learn more.
2. Import asset/issue data from other sources
To create a holistic view of your security posture, Autobahn allows you to add vulnerability data from other tools to your Autobahn's tenant. There are two options that support you to do this.
API-based integration
You can incorporate vulnerability data from sources like Microsoft Defender for Endpoint/Cloud, Cisco Secure Load, Nessus, Qualys, and Tenable alongside your Autobahn scans by clicking the Integrate button on the Scanning page. It will redirect you to the Integrations page, where you can integrate your existing vulnerability management tools with Autobahn. Read more in this guide.

File upload
You can import external results, such as those from penetration tests or red team exercises into Autobahn. Read this article for more details.

3. View all scans and vulnerability reports
The Scanning page is divided into two sections: Scheduled Scans and All Scans.
Once you've scheduled a scan, it will appear in the Scheduled Scans list. This feature saves you the manual effort and allows you to scan your assets regularly. Learn how to do that with this guide.
The All Scans view includes data from Autobahn's vulnerability scanners, manual file uploads, and other sources connected via the Integrations page. The way the details are presented depends on the data source.
Detailed Scan Reports are available for Autobahn's external and internal scans, as well as for file uploads. Learn more about the Scan Report view in this article.
Data from sources such as Cisco, CyCognito, Microsoft Defender for Endpoint, Microsoft Defender for Cloud, Nessus, or Tenable consists of asset and issue-related information. These are not actual scans, as the assets are not accessed by Autobahn's scanning engines. Therefore, clicking on a scan name from one of these sources will redirect you to the Issues view instead of a Scan Report.
To view reports from specific sources, you can filter by the Origin column - simply select the desired tool and press OK.

4. Understand scan statuses
Please note that "scan" refers to both the results of actual vulnerability scans and the data fetched and processed from file uploads or tools integrated with the Autobahn platform.
In Autobahn, there are several different scan (or data fetch) statuses:
Running: scans that have been initiated and are currently in progress. You can still check the details of this process, but you will not see any vulnerabilities during this phase.
Finished: completed scans. When clicked, you will be redirected to the Scan Report page of the selected scan.
Scheduled: planned scans that are set to run at a specific time in the future.
Canceled: scans that have been started but then canceled by a user.
Error: scans that have been started but failed; this can happen when e.g. an internal probe is offline or a scan got stuck. If you see a scan that resulted in an error, please contact us at support@autobahn-security.com and we will help investigate the root cause.
Queued: scans initiated with the same name as an ongoing scan.
5. Assign scans
To keep track of your remediation process and ensure proper ownership, we encourage you to assign scans to your team members.
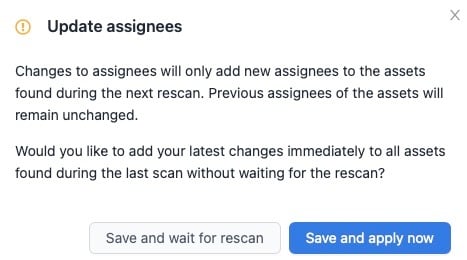
The scan assignee is automatically assigned to all assets within the scan (or data fetch), as well as to the detected issues and, ultimately, the Workouts that provide remediation steps to fix the vulnerabilities.
At its core, this process ensures proper asset ownership, enabling the responsible asset owner to lead the remediation efforts outlined in the Workouts—ultimately helping to lower the Hackability Score.
You can manage scan assignees from the Create Scan, the Scan Report page and from the Scanning view.
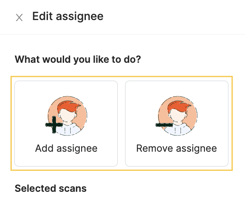
In the Scanning view, select one or more scans using the checkboxes, then click the "Edit assignee" button that appears above the table.
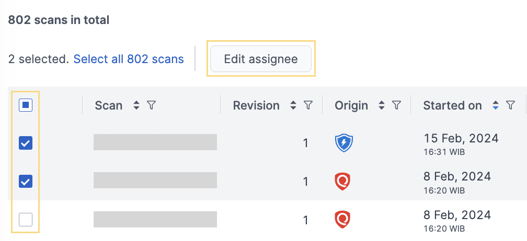
You can now add or remove the scan assignees in the drawer.

6. Change scan configuration
If you wish to edit the scope of your scan, change or add a schedule or modify the port selection, it can be done via the Change scan configuration option. It's available in both the Scheduled scans and All scans table - use the Action column.
You can't change the scan engine - the edits can only be applied within the current scan type (internal or external, Autobahn or Qualys engine)
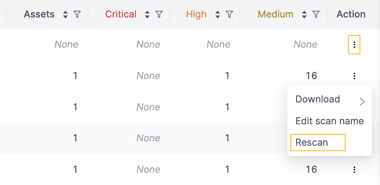
7. Re-scan the targets
By utilizing the re-scan function, you can save time when running a scan with the same scope as your previous scans. It is important to re-scan your assets regularly to ensure that remediated issues are closed and do not resurface.
This feature only works for vulnerability scans that are Finished and were initiated through the scan creation process in Autobahn.
You can initiate a re-scan from the Scan Report page (button in the top right corner) or from the Scanning page (the last column in the All scans table - Action / Rescan):
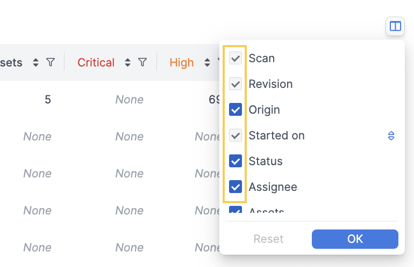
8. Customize the All scans table
You can customize the table display by selecting and hiding specific columns using the Column Selection button. This feature allows you to tailor the view to your preferences, making it easier to focus on what is important to you.
1 - Click the Column selection button.

2 - By default, all columns are selected. To hide a column, uncheck the checkbox, then click the OK button to save the changes. The columns displayed in the table will be updated accordingly.