
Uncover your weaknesses: How to create internal and external scans in Autobahn Fit
Autobahn Fit empowers you to proactively safeguard your infrastructure from potential threats. This article explains how to create a scan with Autobahn Fit. Scans can be conducted from two perspectives: external, mimicking real-world attacker attempts, and internal, focusing on vulnerabilities within your network perimeter.
Table of content
3. Select the probe and ports to scan
4.2. Select asset from your inventory
Before diving into scan creation, it's crucial to ensure proper network configuration. Whitelisting creates an exception for our scanner IPs, allowing them to scan your network without being blocked and ensuring visibility over all your assets. You can find a comprehensive list of these IPs here.
Once whitelisting is complete, proceed with creating your scan using the steps outlined below.
1. Select your scanner
When you start a scan, there are three possible options that might appear:
- Autobahn External (which allows you to run scans on internet-facing assets)
- Autobahn Internal (which allows you to run scans on internal assets, with the use of an internal probe)
- Autobahn Internal powered by Qualys (which allows you to run scans on internal assets, with the use of an internal probe using a Qualys engine) - for more information on the probe installation refer to this article.
By default, Autobahn External is selected. If you wish to run Autobahn Internal or Autobahn powered by Qualys scan but do not see the option, please reach out to your Customer Success Manager or to support@autobahn-security.com.
1 - Select the scanner that you want to use.

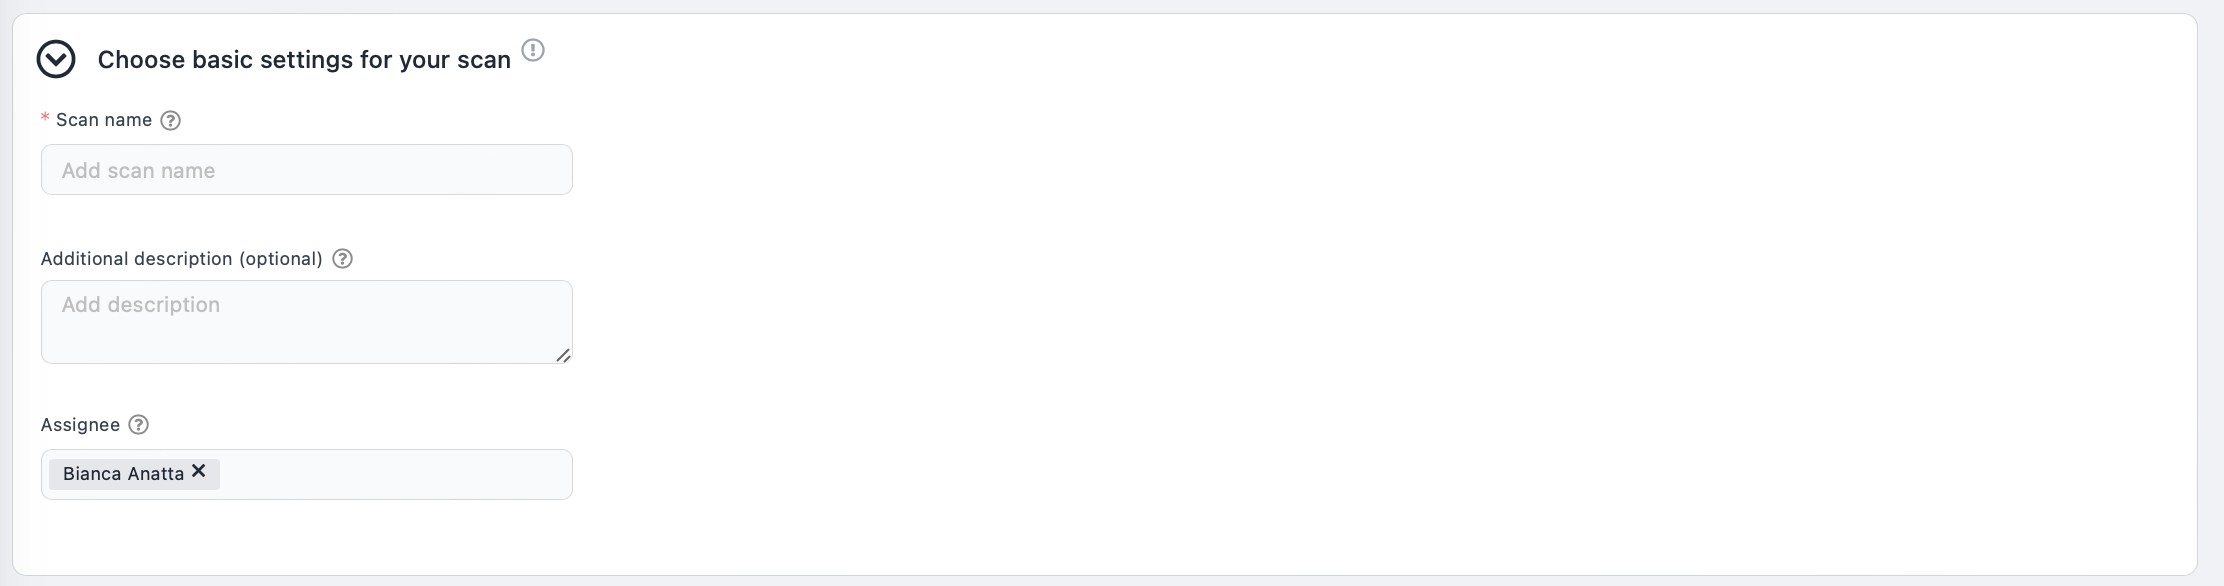
A note on assignees: When selecting an assignee, all issues and assets found on the scan will also be assigned to this person. You can only assign a scan to an organization admin.
2. Schedule your scan
For added efficiency, Autobahn Fit allows you to schedule scans to run automatically at predefined intervals. This way, you won't have to remember to initiate scans manually, and Autobahn Fit can continuously monitor your security posture.
By default, the schedule is set to No schedule - this means that the scan will start immediately.
 By clicking on the scan schedule dropdown, you will see a variety of options to schedule your scan:
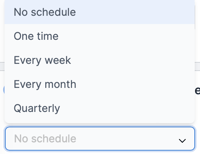
- One-time: choose the one-time option if you would like to schedule the scan once in the future. This is practical, for example, if you want to run a scan on a Saturday at 3am and don't want to have to log into the platform to do so.
- Weekly: choose the ‘Every Week’ option if you would like to have the scan running every once a week.
- Monthly: choose the ‘Every Month’ option if you would like to have the scan running once every month.
- Quarterly: choose the ‘Quarterly’ option if you would like to have the scan running once every three months. You need to also select the time of the day when you would like the scan to run.

What if you want to select a specific date? When you set up a montly or quarterly scan, the date defaults to the day you schedule it (i.e. today). If you'd prefer a different start day, that's easy to change! Simply use your keyboard to enter the desired date and press "Enter" to save the new schedule.
Then, click the Next button to go to the Scan Configuration tab.
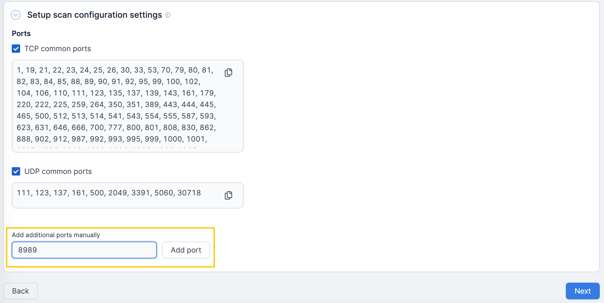
3. Select the probe and ports to scan
In the Scan Configuration tab, if you selected to run an internal scan, you need to select the probe that you would like to use for your scan. This is important if you have a segmented network with multiple probes - make sure to select the one that has reachability over the assets you want to scan.
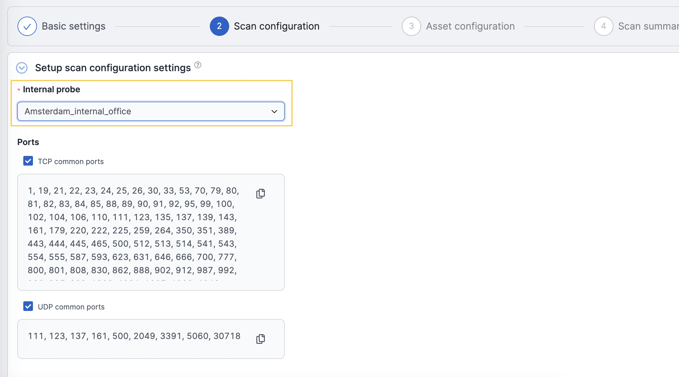

Aside from that, you have the opportunity to choose the specific ports that you want the scan to target. By selecting the ports, you are essentially specifying which areas of your assets you want to be scanned for vulnerabilities.
This level of customization ensures that the scan is targeted to your security needs.
1 - Click on the checkboxes to select the ports that you want to include in the scan. The TCP and UPD ports that are included are the ones we commonly recommend for scans.
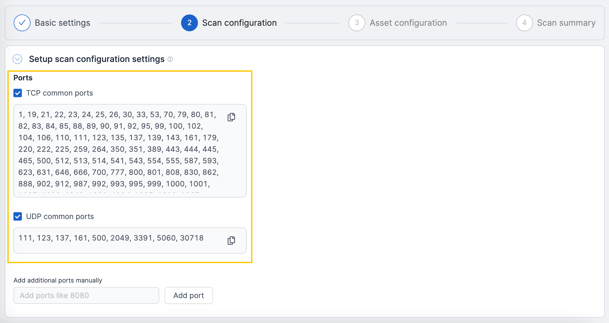
2 - If there are any ports that you do not want to include in the scan, you can untick the box. Then copy the ports to be included into the “Add additional ports” and delete the ports you don’t want to scan.
3 - On the Add additional ports manually, you can also add port range e.g. 20-989.
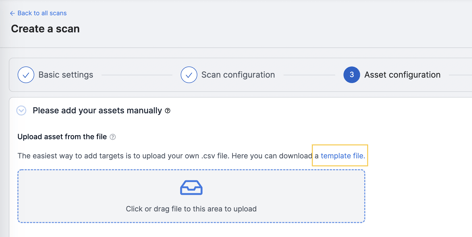
4. Select target assets
This section allows you to select the assets you'll be scanning. You can either manually add specific assets or pick from the existing list of assets in your Autobahn Fit inventory.
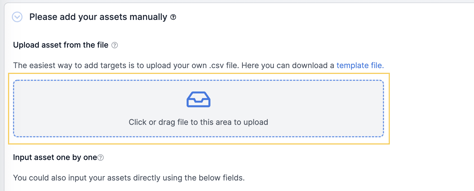
4.1. Upload assets manually
Autobahn Fit offers two ways to manually add assets for scanning:
- Upload a CSV file: This option allows you to import a list of assets from a pre-existing CSV file.
- Manually enter assets: You can directly add individual assets within the Autobahn Security interface. This is useful for adding a few specific domains or IPs.
After selecting the assets, click the Next button to view the scan summary. An asset ownership confirmation box will appear.
3 - If all the assets you added to your scan are the assets that you own, tick the “I accept the End User License” statement, and then click the Acknowledge and continue button.
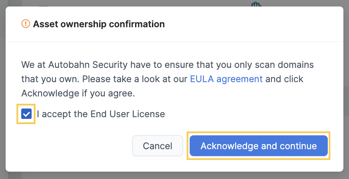
If you breach this condition, we will restrict access to the platform.
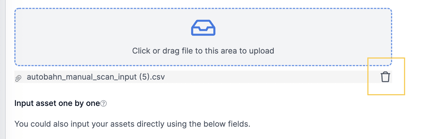
4.1.1. Upload CSV file
1 - Download the CSV template.
2 - Fill the template:
-
(Required) Column a: Your company name, for example, ACME
-
(Required) Column b: Your domains, IPs, and subnets in scope.
-
(Optional) Column c: Your preferred description, for example, ACME website
3 - Upload the CSV file by first locating the newly created file with the Upload function.
4 - Once the file is uploaded, the assets that you added will appear in the table at the bottom.
5 - If you uploaded the wrong document, click the Delete button next to the uploaded file name to remove the file, and then click Yes.
4.1.2. Manually add assets
1 - Input your company name in the Company field. This field is optional.
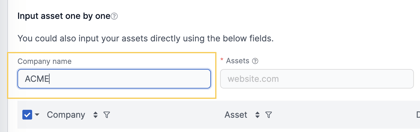
2 - Input your domain URLs or IP addresses in the Domain or IP address field. This field is mandatory.
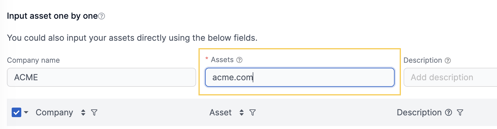
3 - Input the description of that asset in the Description field. This field is optional.
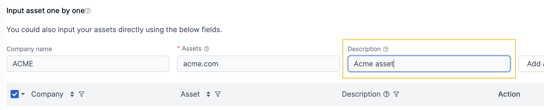
4 - Click the Add asset button to submit the asset
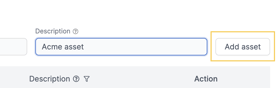
5 - The asset(s) that you added will appear in the table.
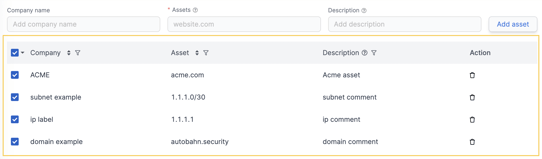
By default, the added asset in the asset table is selected to be included in the scan. Untick the Checkbox next to the company name to exclude them from the asset list.
Note that, if you're adding a domain, it should be the main domain (e.g. autobahn-security.com and not www.autobahn-security.com). When adding a main domain, we will run asset discovery automatically to search for subdomains.
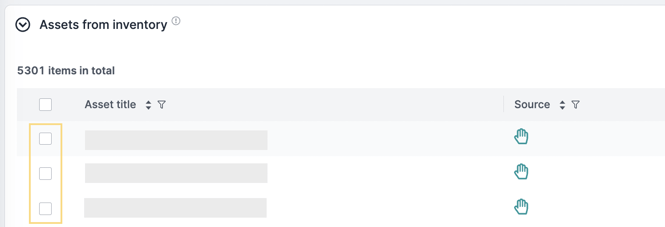
4.2. Select assets from your inventory
You can opt to select the assets that you have added to Autobahn Fit's Assets page. To select the assets, check the asset that you want to include in the scan.
You can also filter them by source, tag, or by the last time they were scanned.
Learn how to add assets to your organization here.
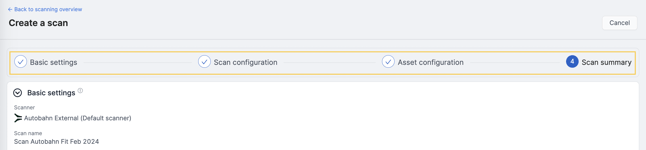
5. Review and start your scan
Before initiating the scan, you have the option to review the information you entered for the scan in the scan summary section.
If there's anything you would like to change, you can go back by clicking on the breadcrumbs menu.
It takes a minimum of two hours for a scan to finish, and it might be much longer depending on how big your scope is. Once the scan is finished, you will receive an email notification.
You can also track the status of your scan under Scanning --> Overview.