
This guide shows you the process of integrating Autobahn with Splunk
Table of content
- Why integrate Autobahn and Splunk
- Integrate your Splunk account
- Send scan results to Splunk
- Temporarily disable the Splunk integration
- Delete Splunk configuration
1. Why integrate Autobahn and Splunk
Splunk is a platform specialized in analyzing machine-generated data. It can collect, search, analyze, and visualize data. When it is integrated with Autobahn, the results of scans created in Autobahn can be sent and visualized in Splunk.
2. Integrate your Splunk account
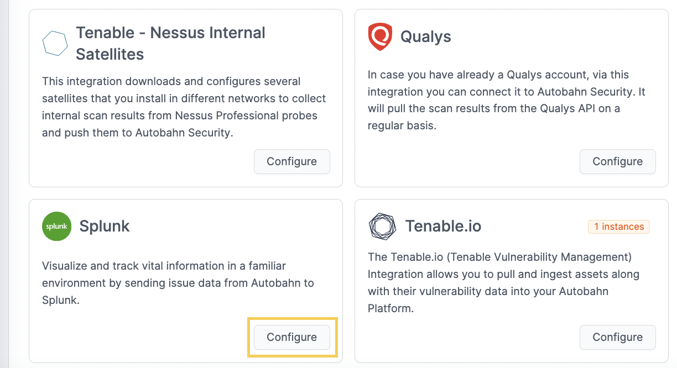
1 - Navigate to the Integrations page on the side menu in Autobahn and click Configure on the Splunk card.
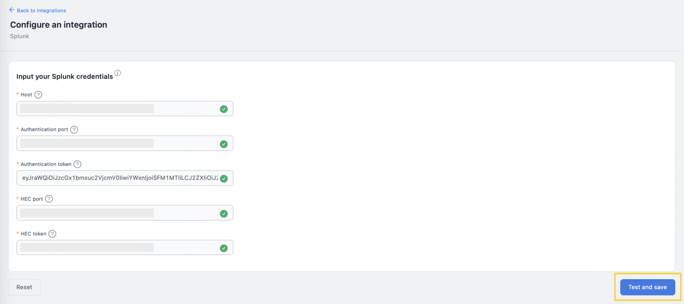
2 - You will be directed to the Splunk configuration page. Enter your Splunk information into the designated fields. How you should get each data point is explained in the tooltip next to each field. Once done, proceed to click on the Test and Save button.
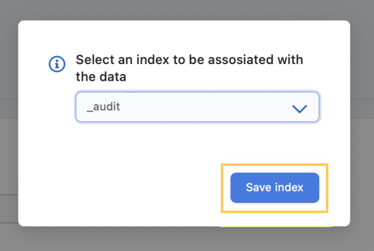
3 - Select the data index you previously chose when setting up your Splunk account. Choose the options from the dropdown and then click the Save index button.
4 - A pop-up notification will show informing you that Splunk has been successfully configured.
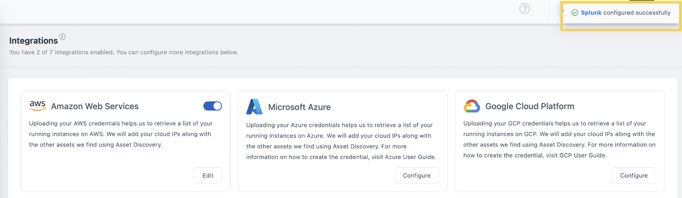
5 - You will be redirected to the Integrations page. You should see that the Splunk integration toggle is now active.
3. Send scan results to Splunk
1 - Go to the Scan report page of the scan you wish to send to Splunk.
2 - On this page, click Send to Splunk in the top-right corner of your screen.
This button will not appear if you have not (properly) configured the Splunk integration.

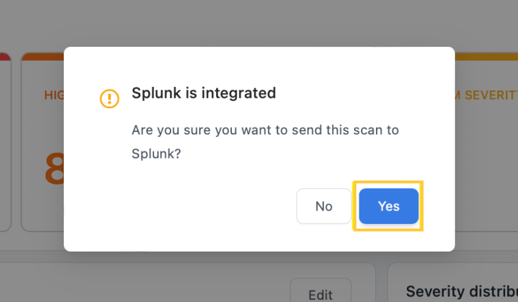
3 - A pop-up will show to confirm that the scan result will be sent to Splunk. Click Yes.
4 - A pop-up notification will appear on the top-right corner of your screen, stating that the scan has been successfully sent to Splunk.
Notice that the send to Splunk button is now disabled. This applies to all scans that have been sent to Splunk.
4. Temporarily disable Splunk integration
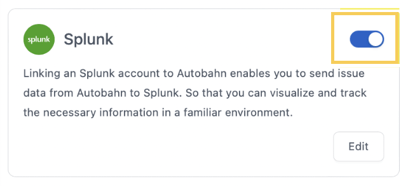
If you already have Splunk integrated and would like to temporarily deactivate it, go to the Integrations page. You should see that Splunk integration is active.
1 - Click on the toggle highlighted below.
2 - A pop-up will show to confirm deactivation. Click Yes.
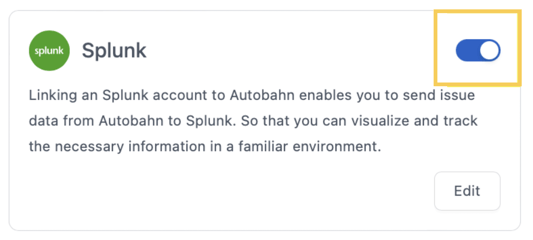
3 - The toggle will change to disabled. You can change this anytime by clicking the toggle again to re-activate Splunk.
5. Delete Splunk configuration
If you already have Splunk integrated and wish to delete the configuration, you can follow the steps below.
1 - On the Integrations page, Click Edit on the Splunk card.
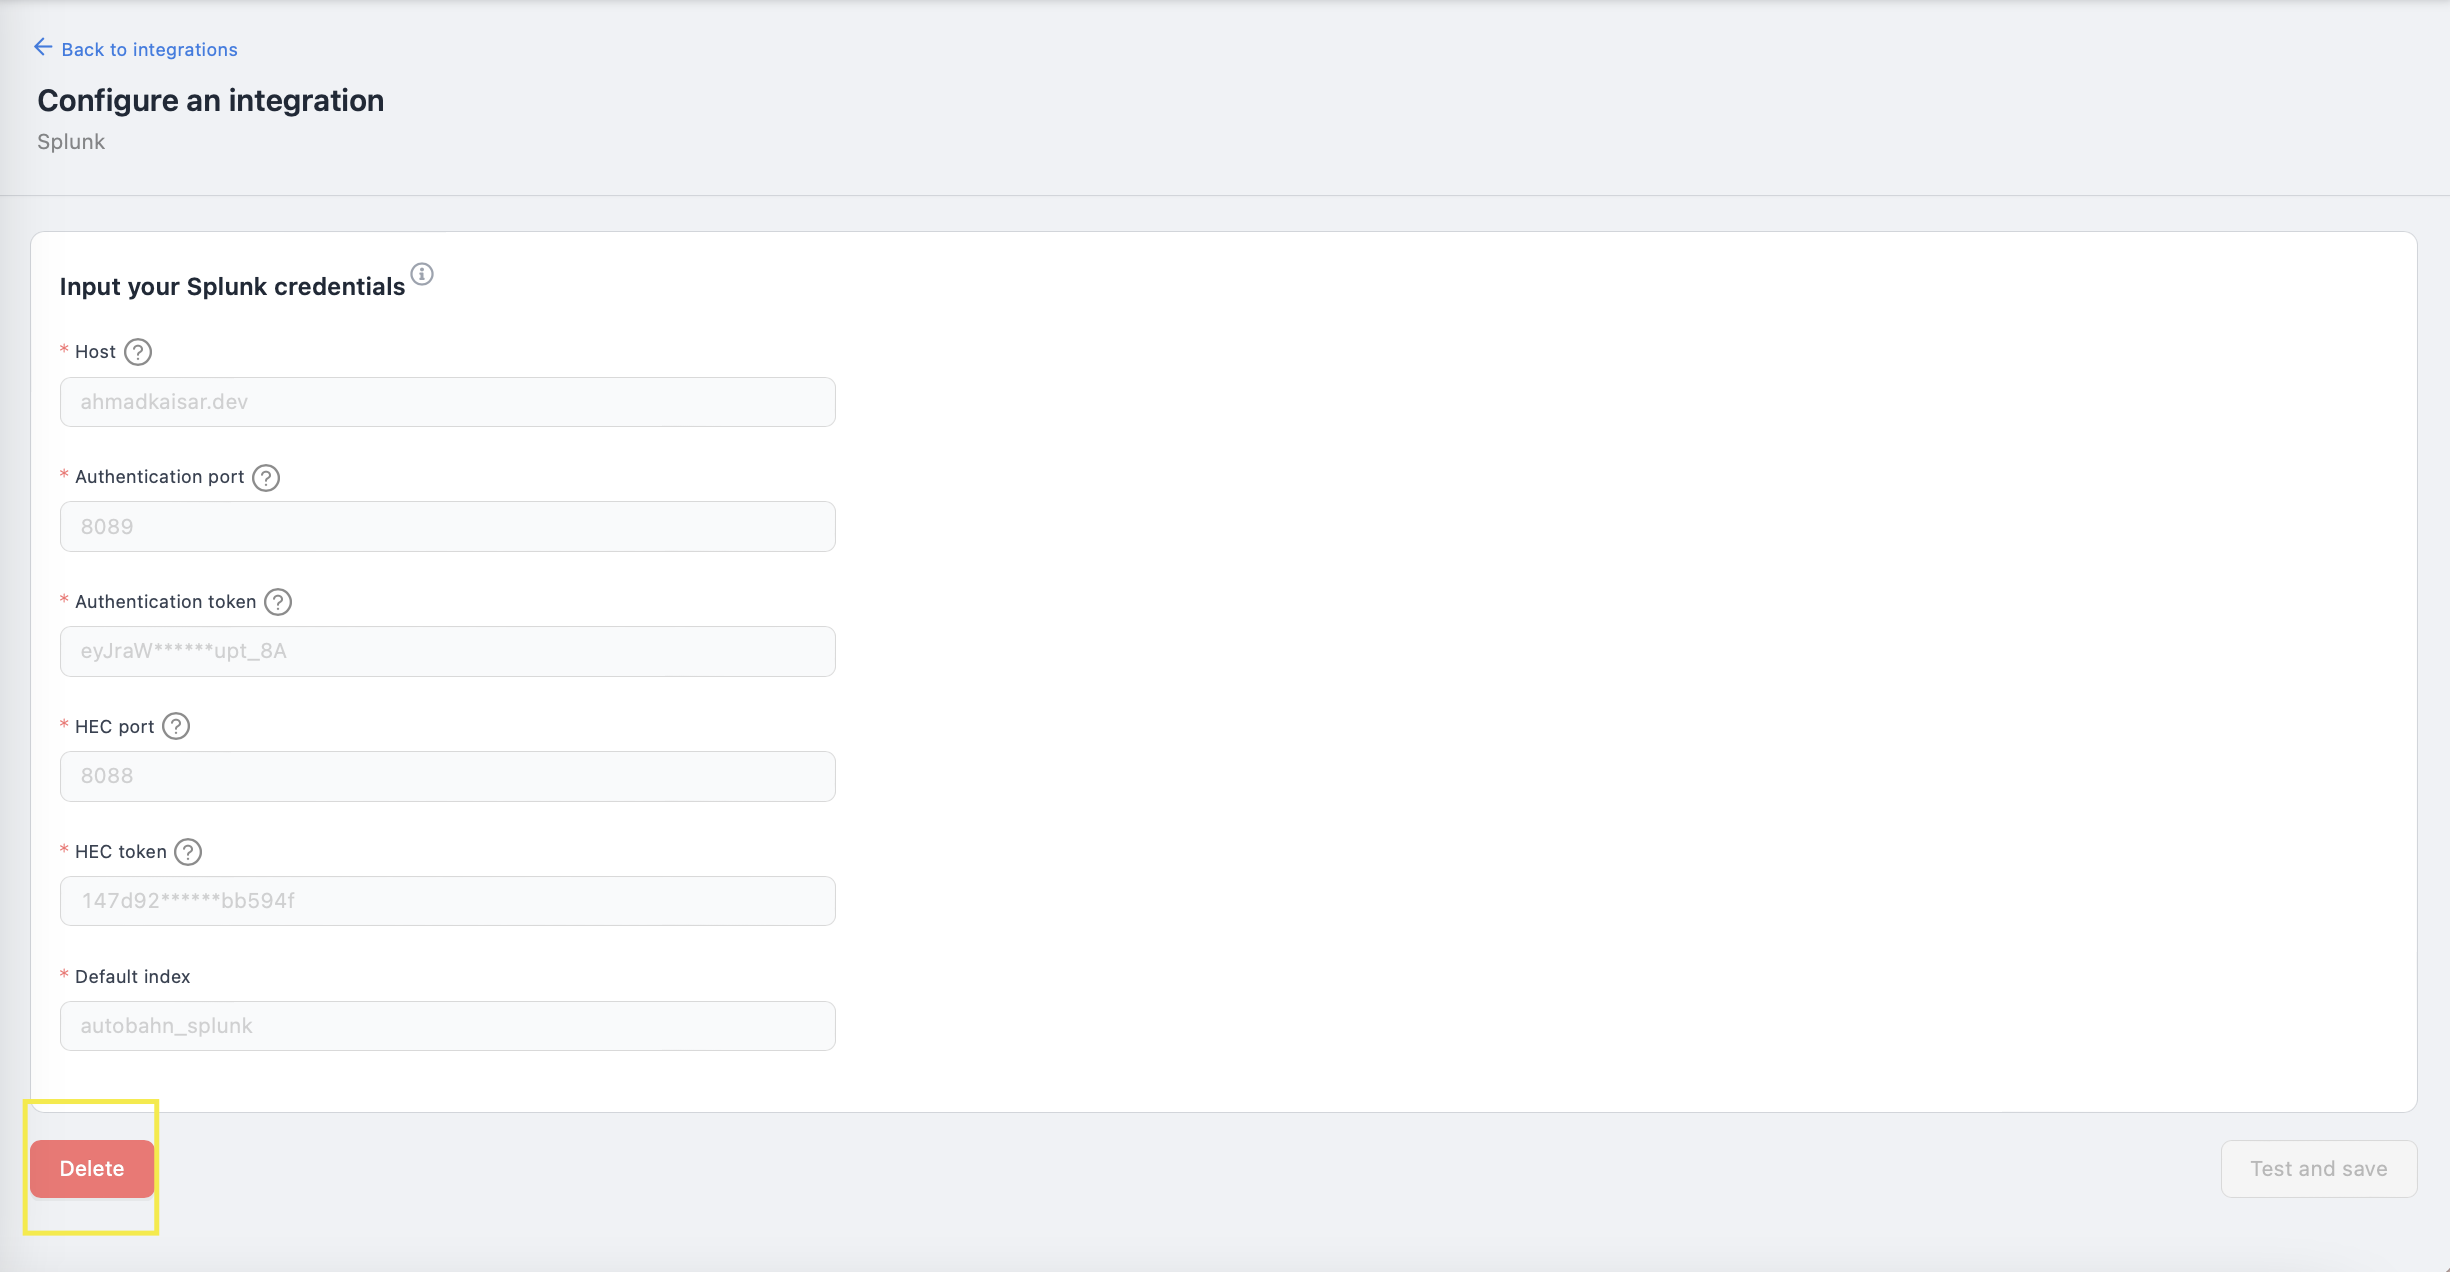
2 - You should see that the Splunk configuration form is filled. Click the Delete button.
3 - A prompt will show to confirm the deletion. Click the Yes button.
4 - The form will be reset and you can fill it with Splunk credentials if you wish to integrate again.