
This guide will instruct you how to integrate your Qualys account with Autobahn, so the platform can automatically pull Qualys' vulnerabilities and show them in Autobahn.
Table of content
- Why integrate Qualys with Autobahn
- Required information to enable the integration
- Integrate Qualys with Autobahn
- Enable or disable integration
- Delete Qualys integration configuration
- View imported Qualys data
1. Why integrate Qualys with Autobahn
By integrating Qualys with Autobahn, you enable Autobahn to pull scan results from the Qualys API regularly.
The pulled data can then be seen in the Autobahn platform, and will be matched to Cyber Fitness Workouts to make remediation much easier. The imported scans will be conveniently displayed on the Scanning page for easy access and management.
2. Required information to prepare integration
To enable the integration, the following information is required:
- Qualys platform URL
-
Username and password
Aside from that, you need to check your Qualys user settings and make sure that the user you will use for the integration has:
-
Allowed API connections (more below)
-
The correct user role (we advise at least Unit Manager, more on this below)
Please note that Autobahn only fetches scans. Therefore, please double-check whether scans are visible or not.
2.a. Qualys platform URL
On the Integrations page, you need to add your Qualys platform URL. To get this URL you should copy the URL of the webpage you normally use to log into Qualys.

2.b. Username and password
You need to add both the Qualys username and password of the user you are going to use for the integration. Please note that the username mentioned here is not your email, but the username that you use to log into your Qualys account.
2.c. Qualys user settings
To verify the account you are using for the integration has the correct user settings, you need to:
1 - Log into your Qualys account.
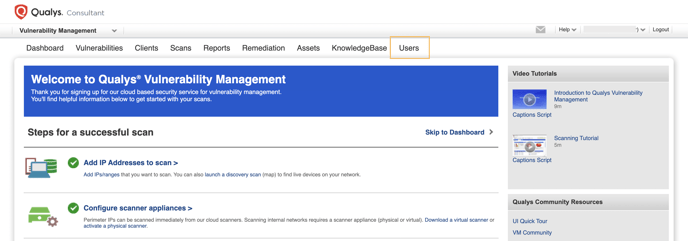
2 - Navigate to the Users page by clicking the Users button on the top navigation bar.
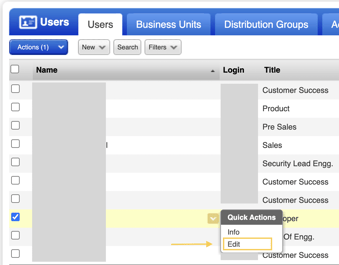
3 - On the Users page, navigate to the specific user. Click the dropdown arrow button next to the name.

3 - A dropdown will appear, click Edit. You will be directed to the Edit User page.
4 - On this page, click the User Role button on the sidebar.

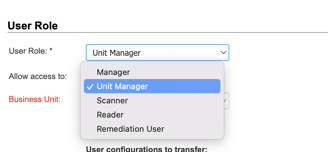
5 - The first thing you need to do is check the account user role. Click the User Role dropdown to see the available roles.
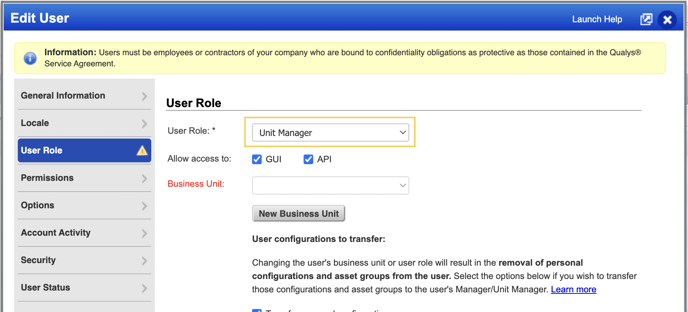
There are 5 options of roles, make sure the role that you select has the ability to view map and scan history. We advise to use an account with at least Unit Manager permissions.
Check this document to see each role's capability: https://qualysguard.qg2.apps.qualys.com/qwebhelp/fo_portal/user_accounts/user_roles_comparison_vm.htm.
6 - After you update the user role, make sure you allow access to API.

7 - Once done, click the Save button to save the changes.

3. Integrate Qualys with Autobahn
After preparing the credentials, log into your Autobahn account and navigate to the Integrations page.
1 - On the Qualys card, click the Configure button. You will be directed to the Qualys integration page.
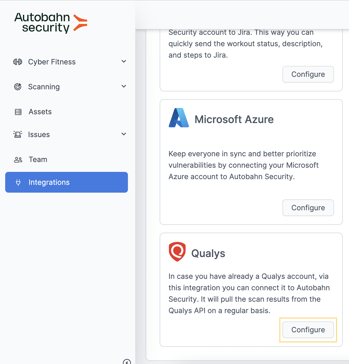
If you already have Qualys configured, this means that someone in your organization has already configured a Qualys account, and this applies organization-wide.
To enable the integration, you need to add your credentials.
2 - Input the Qualys platform URL in the Platform URL field.
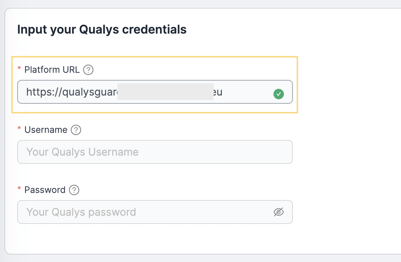
3 - Input your Qualys username in the Username field.

4 - Input your Qualys password in the Password field.

3.a. Specify data pulling time span
You can specify which scans you want to import, up to 3 months ago. To select from when the integration should pull results:
1 - Click the time span dropdown. A calendar will appear.

2 - Click the desired starting date. This will grant Autobahn access to Qualys scan reports that were created since the selected date.

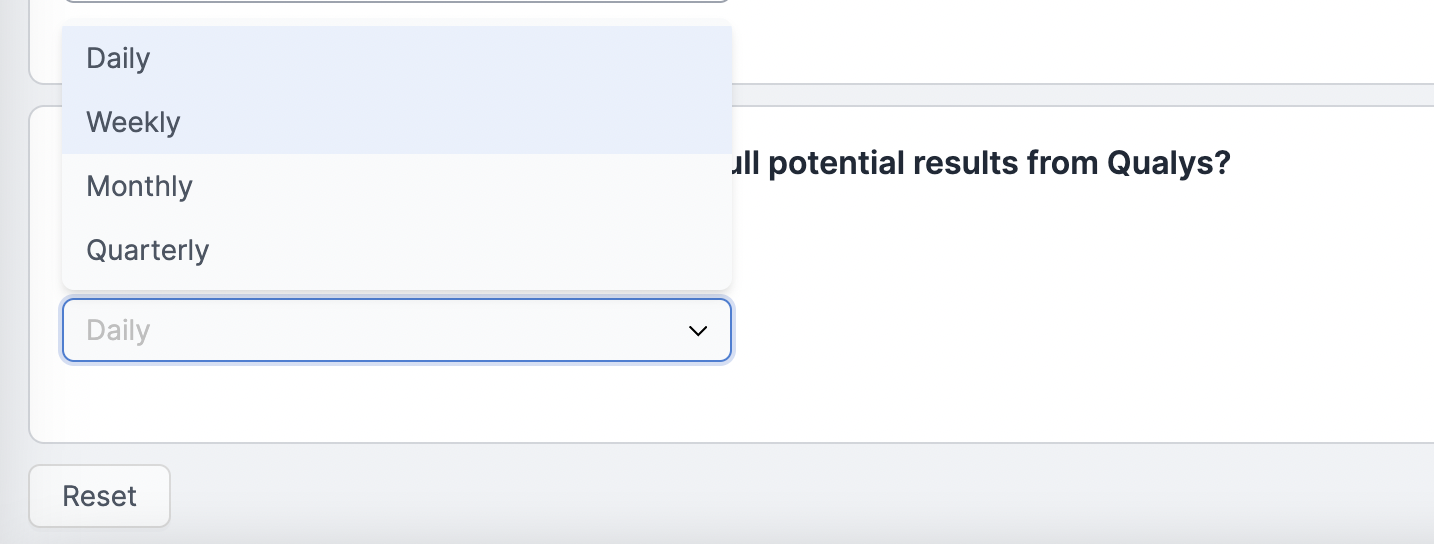
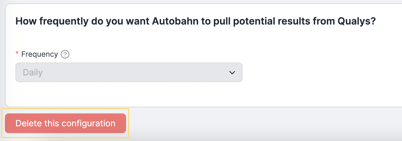
3.b. Select how frequently you want data to be pulled
With the integration, Qualys scan data will be pulled automatically on specific time intervals. You can select how frequently you want data to be pulled.
1 - Click the Frequency dropdown.
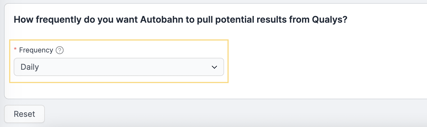
2 - Select the desired frequency.
After you filled all required fields, click the Test and save button to save and run the integration. If the credentials are correct, you will be directed to the Integrations page.

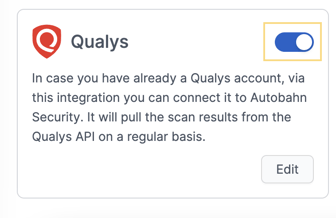
4. Enable or disable integration
After you integrate your Qualys account, you can enable or disable the integration by:
1 - Navigate to the Integrations page.
2 - Switch off the toggle on the top right of the Qualys card. The blue toggle indicates that the integration is enabled.
5. Delete Qualys integration configuration
1 - Navigate to the Integrations page.
2 - Click the Edit button on the bottom of the Qualys card.
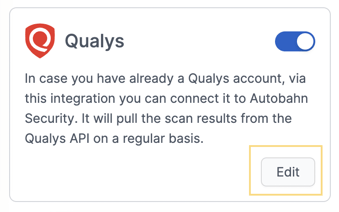
3 - You will be directed to the Qualys Integration page. Click the Delete this configuration button to remove the live integration. Please note that the data that you already imported will remain in the Autobahn platform.
6. View imported Qualys data
After you enable the integration, the Autobahn engine will immediately start fetching your data. To view your data, navigate to the Scanning page.
Here, the Origin indicates the source of the scan, in this case, the scans imported from Qualys carry the Qualys logo.
