
Learn how to automatically get AWS compute instances into Autobahn so you can include them as the scanning targets
Table of content
- Autobahn’s integration with Amazon Web Service
- Required elements to prepare
- Integrate AWS with Autobahn
- Enable or disable integration
- Update the AWS integration configuration
- View your AWS assets on the Assets page
1. Autobahn’s integration with Amazon Web Service
Integrating your company's Amazon Web Service account enables Autobahn to automatically retrieve a list of your running AWS compute instances. These can then be used as targets by the scanning engine. This guide explains how to set up this integration.
2. Required elements to prepare
By integrating your Amazon Web Service account with Autobahn, you enable Autobahn to automatically discovers any running instance(s) hosted on AWS. This means that Autobahn can also scan these assets. To enable the integration, key elements are required:
-
Access key ID and Secret access key
-
Code of the AWS region you use
-
Set permission for global credential
2.a. Retrieve Access key ID and Secret access key
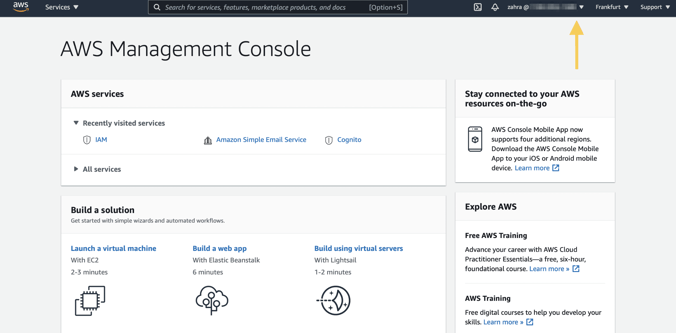
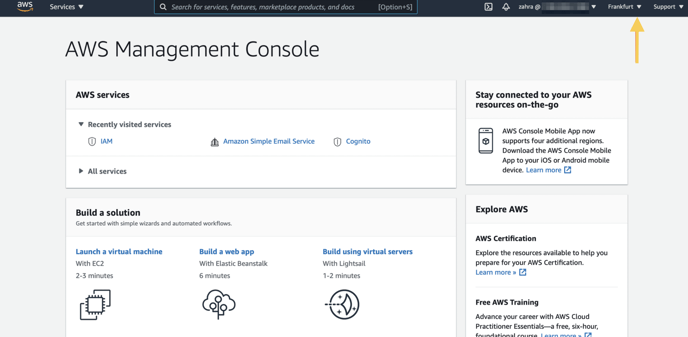
1 - Log in to the AWS Management Console.
2 - Click on User profile in the top right corner.
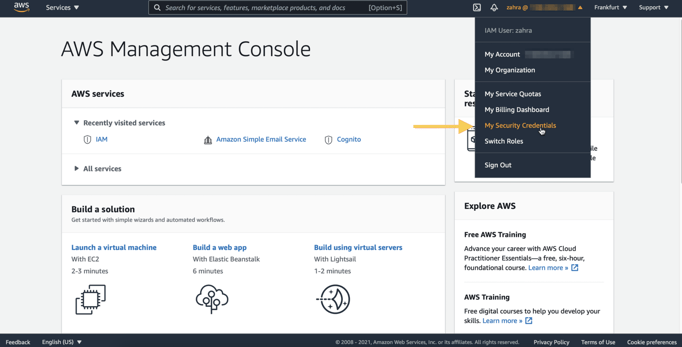
3 - From the drop-down, select My Security Credentials.
4 - In the IAM Management Console, scroll down until you see the section Access keys for CLI, SDK, & API access.
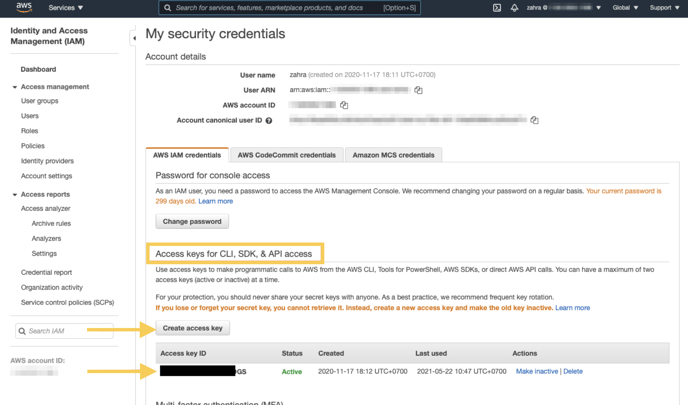
5 - If you have an Access key ID already, you will find it here. If you do not see one, click Create access key to generate a new one. For this, you need the AWS permission iam:CreateAccessKey, so make sure you have this permission before creating a key ID. More information on permissions in the AWS documentation.
6 - Important: If you just created a new Access key ID, take note of the Secret access key shown right after generation. You can also download the CSV file which contains both the Access key ID and the Secret access key. This is the only time you can view or download it.
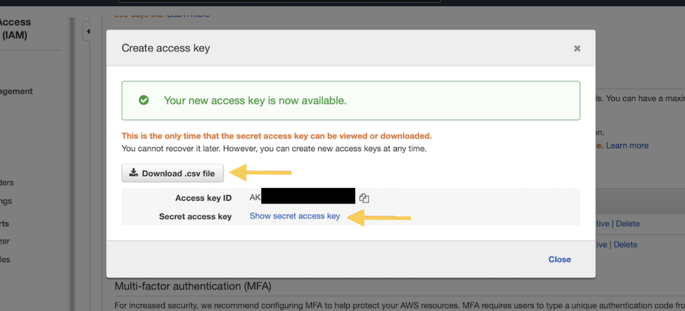
To recap, the Secret access key is only shown once when generating a new Access key ID. If you do not have this information anymore, create an Access key again as per the steps above.
2.b. Retrieve your AWS region code
1 - While logged in to the AWS Management Console, find the name of the AWS region used (next to the Support key). In our example, this is Frankfurt. Click on that region.
2 - Next to the region you are using, you see the AWS abbreviation (code), in our example eu-central-1. Copy this code for later use.

2.c. Set the correct access rights in AWS
For Autobahn to query the relevant AWS assets, your AWS account to which the Access key ID and Secret access key belong to, must have the correct policy that allows for action ec2:DescribeInstances
Follow these steps to add permissions to your AWS account to ensure you have the correct policy:
1 - While logged in to the AWS Management Console, search for IAM in the search bar.
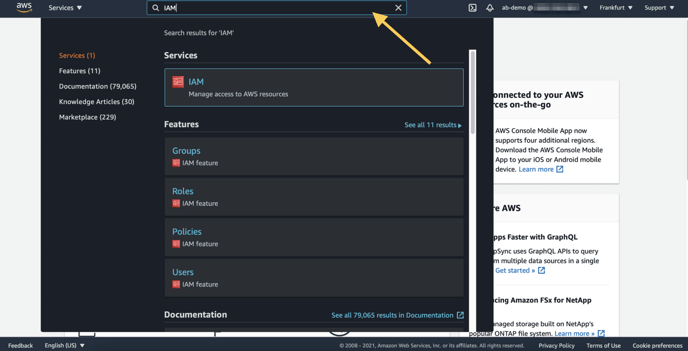
2 - Click on IAM listed in the Services section.
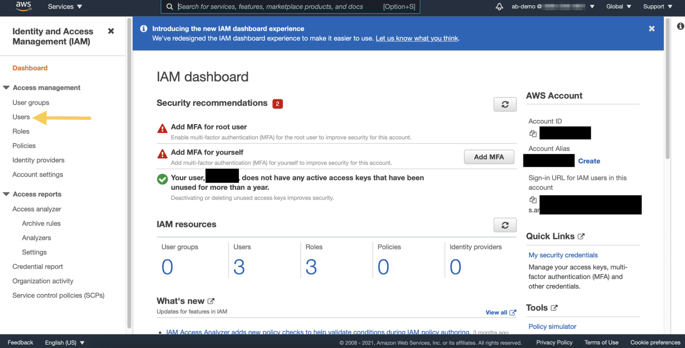
3 - In the IAM dashboard, select Users on the left navigational bar.
4 - Here, select the username of your AWS account and in the screen that follows click Add permissions.

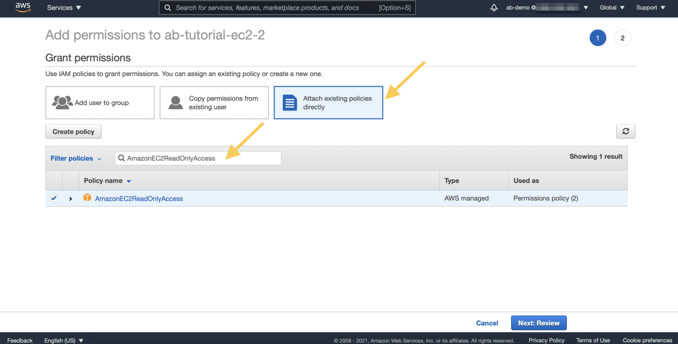
5 - In the Add permissions screen, click on Attach existing policies directly. In the filter, type AmazonEC2ReadOnlyAccess, select it and click on Next: Review. In the final screen, click Add permissions.
You are all done.
3. Integrate AWS with Autobahn
After you are done with the preparation on the AWS side, you can integrate the account by logging into your Autobahn account.
1 - Once logged in, navigate to the Integrations page.
2 - Click the Configure button on the Amazon Web Service card. You will be directed to the Amazon Web Service integration page.
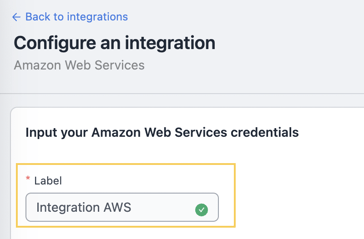
3 - Input the integration label at the Label field. Pick a good name so that you can differentiate between multiple integrations.
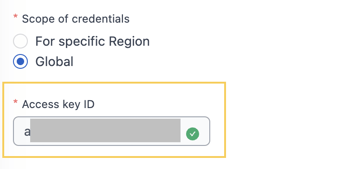
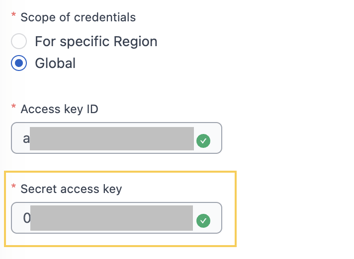
2 - Select the Scope of credentials.

There are two options for the scope of credentials:
For specific region: select this option to allow assets from a specific region to be included in your asset inventory.
Global: select this option to allow all assets from all regions to be included in your asset inventory by adding a single credential.
Please note that due to the nature of Amazon Web Service’s project and region setup, we cannot pull the projects from the United Arab Emirates (UAE) region through the global credentials function. Thus, to get projects from the UAE region, you must select the specific region in this section.
3 - Fill the Access key ID field.
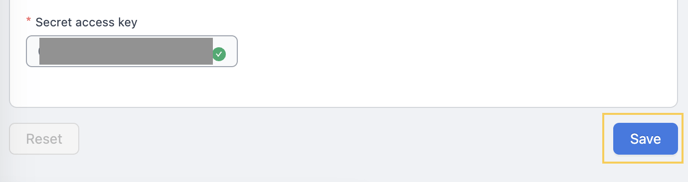
4 - Fill the Secret access key field.
5 - To save the credentials, click the Save button
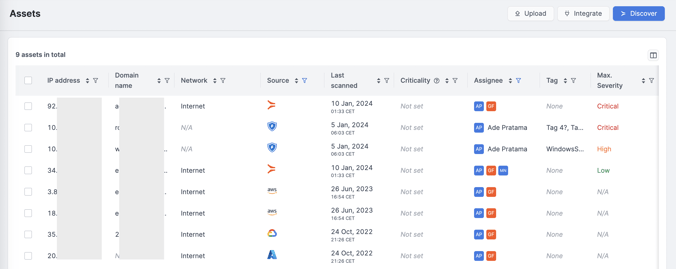
Once the integration is enabled, assets will begin to appear on the Assets page.
Depending on the number of assets, it may take up to one hour for them to be fully displayed. To narrow down the view, you can filter the data by using the Source column.
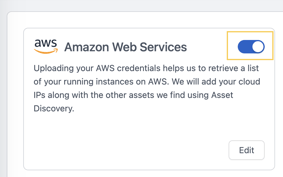
4. Enable or disable integration
After you integrate the AWS account, you can enable or disable the integration. Disabling your integration will keep the credentials and the previously pulled data in the Autobahn platform, but will stop the automated data collection.
1 - Navigate to the Integrations page.
2 - Switch off the toggle on the top right of the AWS card.
5. Update the AWS integration configuration
1 - Navigate to the Integrations page.
2 - Click the Edit button on the bottom of the Amazon Web Services card.
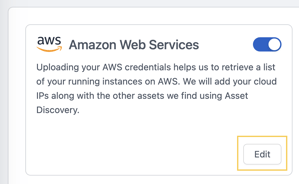
3 - You will be directed to the AWS Integration page. Click the Reset button to change the credentials.
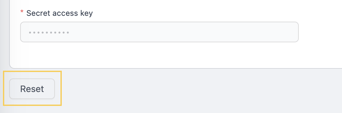
Resetting the credentials will not affect the data that has already been pulled into Autobahn - this data will remain available in the platform.