Learn how to automatically get GCP instances into Autobahn so you can include them as the scanning targets.
Table of contents
- Autobahn integration with Google Cloud Platform
- Required preparation on the GCP side
- Navigate to the GCP integration
- Enable or disable integration
- Update the GCP integration configuration
- View your GCP assets on the Assets page
1. Autobahn integration with Google Cloud Platform
When starting a scan, Autobahn automatically discovers external assets related to your company. When you integrate your GCP account with Autobahn, you enable the platform to automatically retrieve a list of your running GCP compute instances. These cloud IPs can be used as targets for the scanning engine.
2. Required preparation on the GCP side
To enable this integration, several things need to be done/created on the GCP side:
- Creation of GCP credentials
- Generation of GCP Key
- Enabling API, and
- Granting user access
2.a. Create GCP credentials
There are two ways you can set up your GCP integration in the Autobahn platform:
- Using one single credential that can access all of your zones (global), or
- Differentiate by zone, so have a different credential per zone.
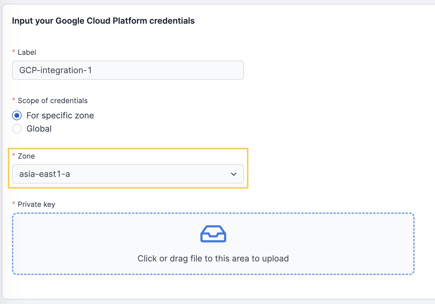
If you want to use global credentials, you need to make sure that the credential you are creating here gets access to the root project (in other words, the project in GCP where all your other projects are assigned to). Doing so will mean that any projects under its root can be accessed immediately.
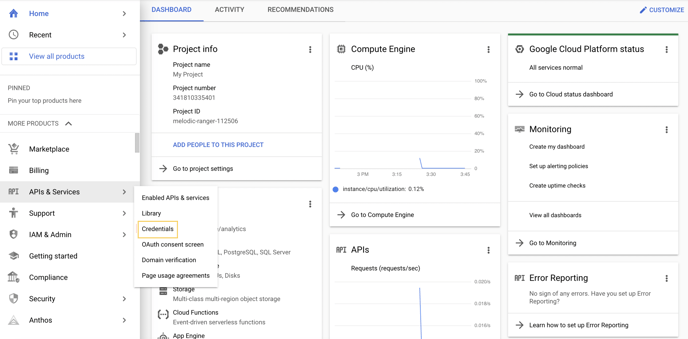
1 - Login to your Google Cloud Console portal.
2 - Navigate to APIs & Services > Credentials.

3 - Click the + CREATE CREDENTIALS button and choose Service account.
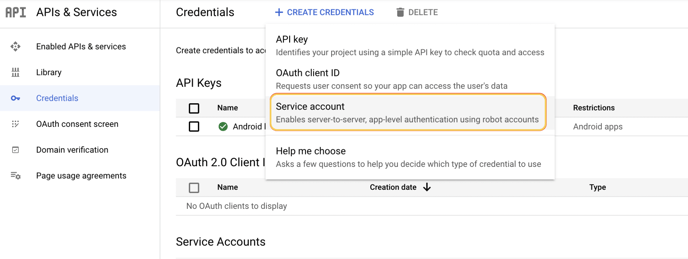
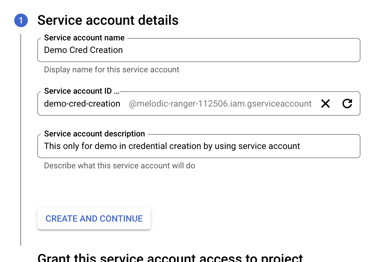
4 - Enter the basic information for the service account, then click the CREATE AND CONTINUE button.
2.b. Generate Key
1 - After the service account has been created, navigate to Manage service account.

2 - In the chosen service account, navigate to Actions column, and choose Manage keys.
3 - Open the detail information of the selected service account at the KEYS tab.
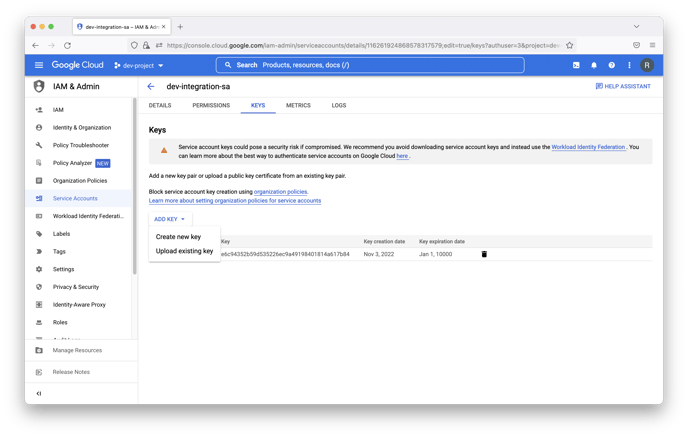
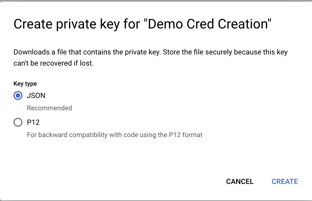
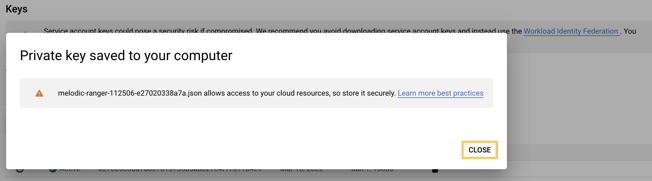
4 - In the ADD KEY dropdown menu, you can create a new key or upload an existing public key. For the private key, it has to be saved in JSON format.


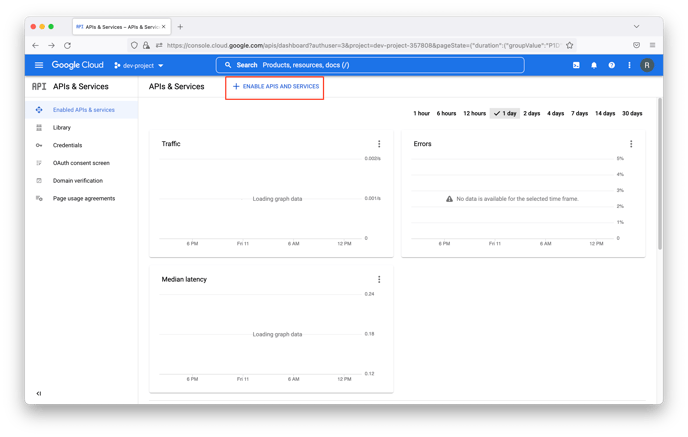
2.c. Enable the API
The API will be used to give access to Autobahn's asset discovery engine so it can read the resources in GCP.
1 - In the APIs & Services, navigate to Enabled APIs & Services page.
2 - Click the ENABLE APIS AND SERVICES button, and enable the Cloud Resource Manager API and Compute Engine API.
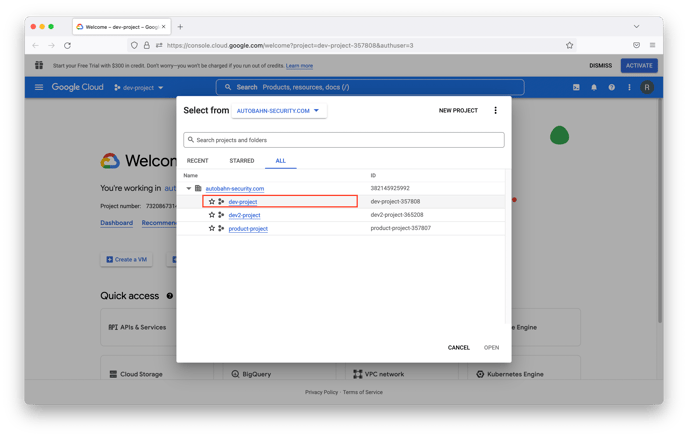
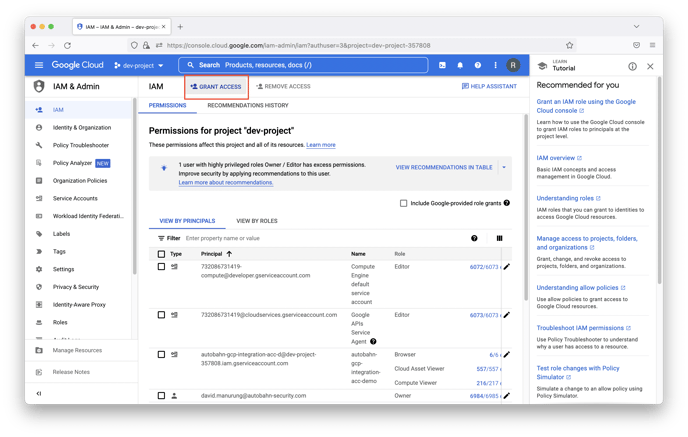
2.d. Grant user access
Based on GCP's resource hierarchy, we can set the coverage/visibility of the assets based on the access that was given.
1 - In the project selection (top right of the GCP dashboard), choose the desired highest level of visibility.
2 - In the selected level, open IAM & Admin, then open the IAM page.
3 - Click on the GRANT ACCESS button.
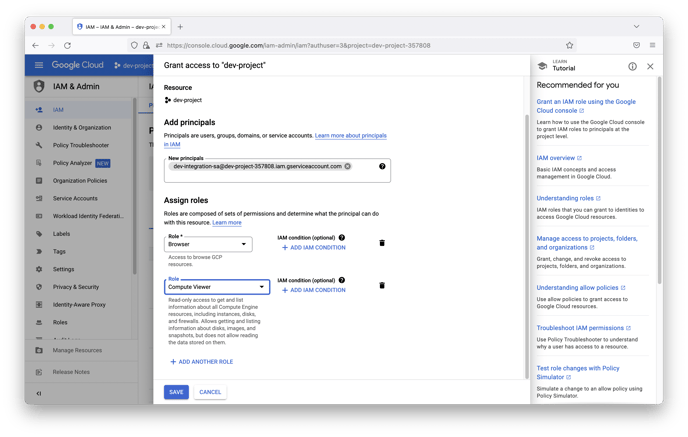
4 - In the Grant Access drawer, select the principal (service account) that will be granted access.
5 - In the Assign roles, add Browser and Compute Viewer as role.
Let's now set up the integration in Autobahn.
3. Integrate GCP with Autobahn
After the preparation on the GCP side is done, you can integrate your account with Autobahn by logging into your account.
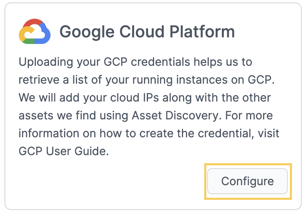
1 - Navigate to the Integrations page from the sidebar and click the Configure button on the Google Cloud Platform tile.


For specific zone: select this option to allow assets from specific zones to be included in your asset inventory.
Global: select this option to allow all assets from all zones to be included in your asset inventory by adding a single credential.
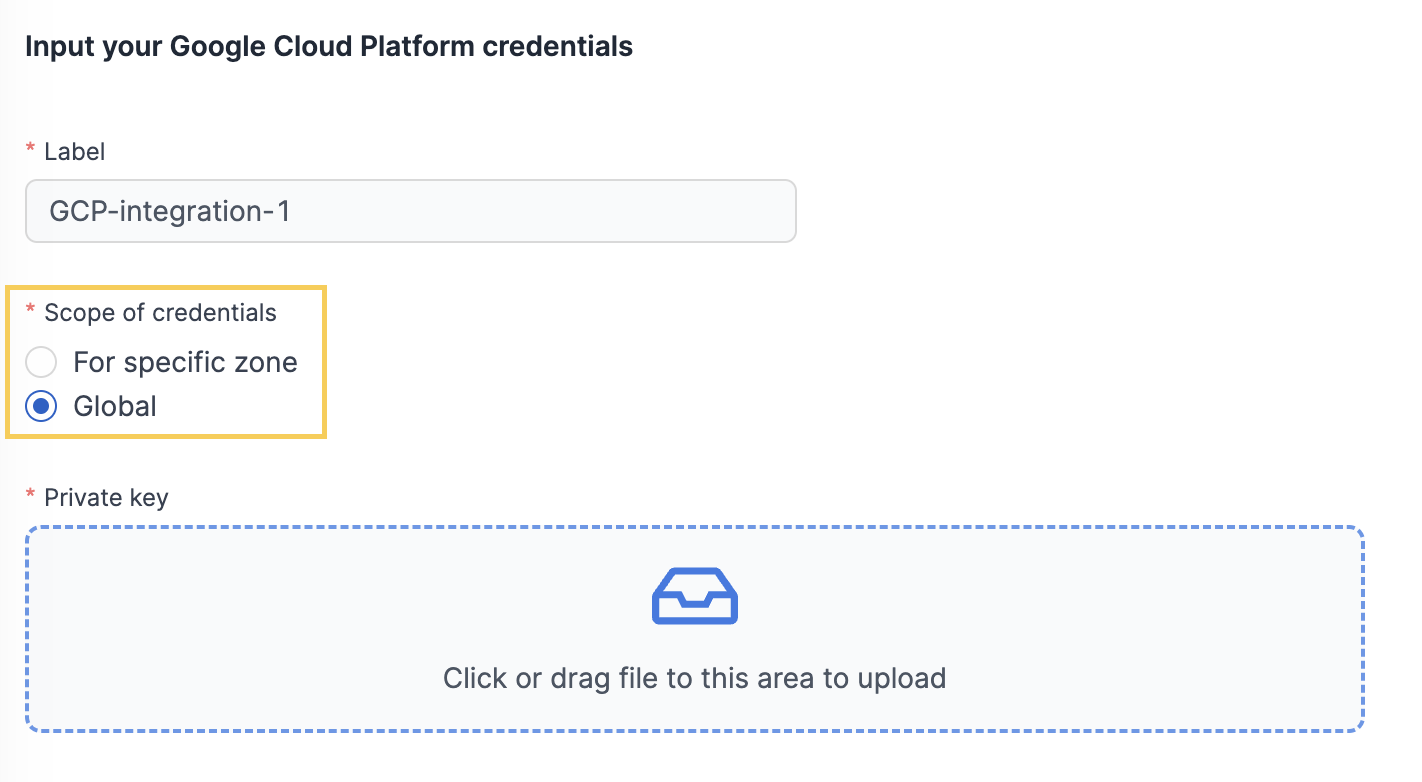
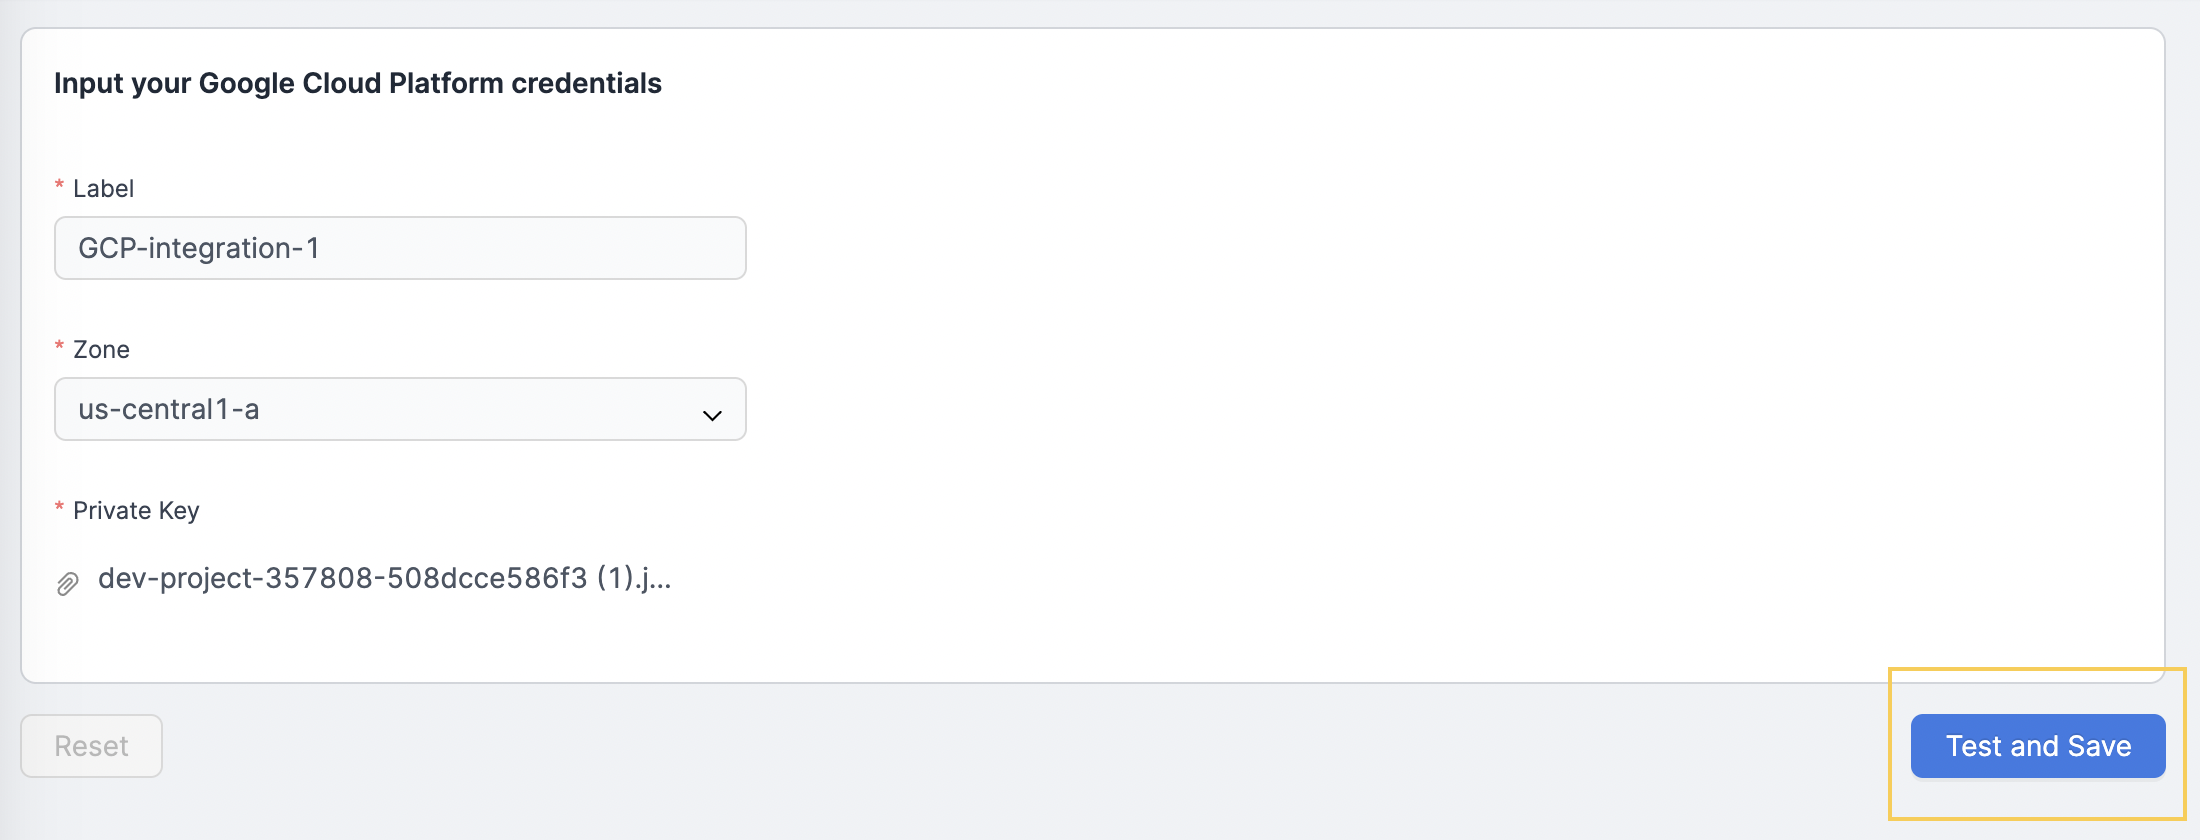
If you chose a zone, click on the Zone dropdown and select your GCP zone.


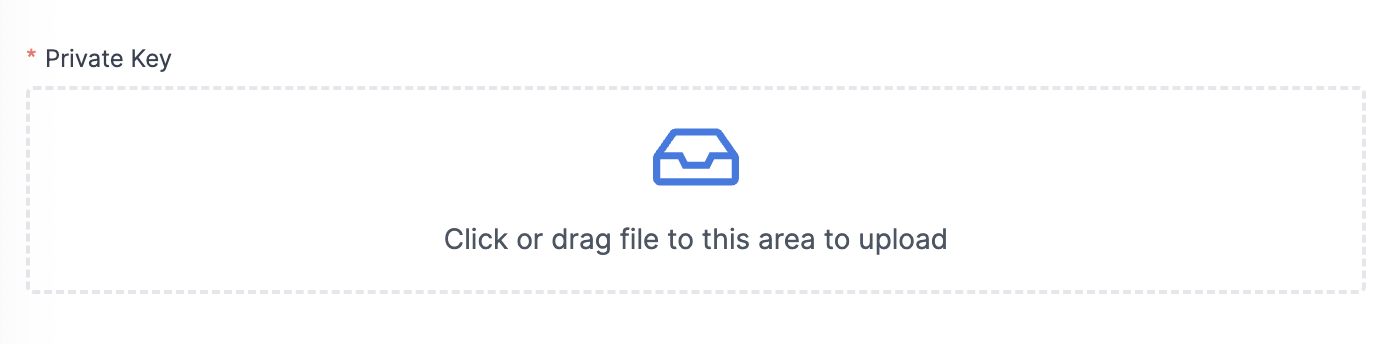
4 - Upload your GCP private key.

5 - After you fill all the fields, save the credentials with the Test and Save button.

4. Enable or disable integration
After you integrated your GCP account, you can enable or disable the integration by:
1 - Navigating to the Integrations page.
2 - Switching the toggle on the top right of the GCP card on or off.
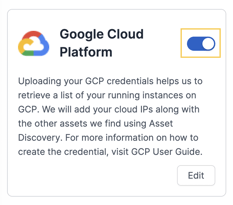
Disabling your integration will keep the credentials and the previously pulled data in the Autobahn platform, but will stop the automatic data collection.
5. Update the GCP integration configuration
1 - Navigate to the Integrations page.
2 - Click the Edit button on the bottom of the GCP Software card.

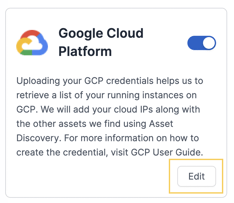
3 - You will be directed to the GCP Integration page. Click the Reset button to remove the existing credentials.
Resetting the credentials will not affect the data that has been pulled into Autobahn.
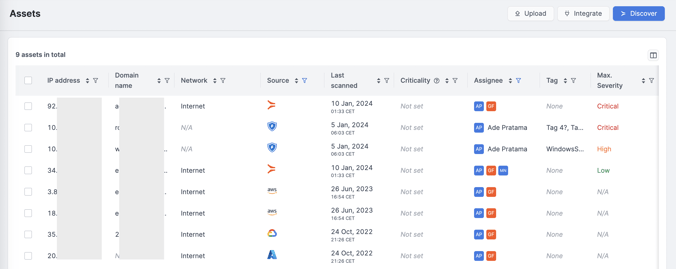
6. View your GCP assets on the Assets page
After you enable the integration, the assets will appear on the Assets page. You can filter the data source on the Source column to make this easier. It might take up to one hour to display your assets, depending on the number of assets you have.