Pull and ingest assets along with their vulnerability data into the Autobahn platform.
Table of contents
- Benefits of integrating Tenable.io with Autobahn
- Grant permission to view scans
- Grant permission to fetch tags
- Create a new user
- Generate Access Key and Secret Key
- Integrate Tenable with Autobahn
- Enable/disable your instance
- Remove instance
1. Benefits of integrating Tenable.io with Autobahn
Tenable Vulnerability Management (formerly Tenable.io) acts as a central hub for Nessus scanners, Nessus Agents, and Nessus Network Monitor.
- Nessus scanners are powerful tools that identify vulnerabilities within your devices.
- Nessus Agents are lightweight programs that continuously monitor your devices for security weaknesses.
- Nessus Network Monitor keeps an eye on your network traffic, detecting any suspicious activity.
Tenable Vulnerability Management allows all these tools to share information seamlessly. This includes sharing scan schedules, policies, and most importantly, the scan results themselves.
By connecting your Tenable Vulnerability Management account with Autobahn, you can easily import all your assets and their associated vulnerabilities. This data will be readily available in both the Assets and Issues pages within Autobahn.
Even better, Autobahn goes beyond just showing you the vulnerabilities. The platform analyzes the data and prioritizes the issues based on their real-world exploitability, not just CVSS scores. This provides a much clearer picture of what threats need your immediate attention.
On top of that, Autobahn offers step-by-step remediation guides for each identified issue. These guides - Cyber Fitness Workouts - help your team resolve the vulnerabilities efficiently, streamlining your overall security posture.
2. Grant permission to view scans
1 - Log into Tenable Vulnerability Management.
2 - Navigate to the Settings page.

3 - On the Settings page, navigate to Access Control.

4 - Click the Create Permission button on the Permissions tab of the Access Control page.
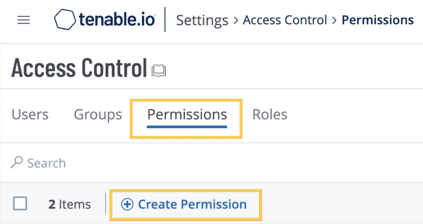
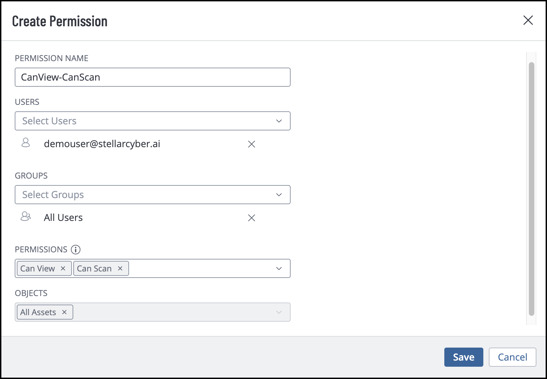
5 - You will be directed to the Create Permission page. Set the permissions as follows:
-
Permission Name: autobahn_integration
-
Permissions: Can view
-
Objects: All Assets
Once done, click the Save button.
3. Grant permission to fetch tags
After granting view scans permissions, create additional permissions for tags fetching by repeating the same steps, and adding the following details to the fields:
-
Permission Name: all_tags
-
Permissions: Can Use
-
Objects: All Tags
4. Create a new user
1 - Navigate to the Settings page, then navigate to Access Control.
2 - On the Access Control page, click the Create User button.
3 - The Create User page will appear. Fill the fields with the necessary information. You can check this page to learn more about the user creation rules in Tenable.
-png.png?width=658&height=243&name=createuseraccount%20(1)-png.png)
4 - In the ROLE field, select “Basic User”.
5 - Enable the API Key option.
6 - On the PERMISSIONS field, select both permissions you created earlier for integration purposes. You can see more information about permissions here.
7 - Finally, click the Save button.
5. Generate Access Key and Secret Key
1 - Login to Tenable Vulnerability Management with the User you created above.
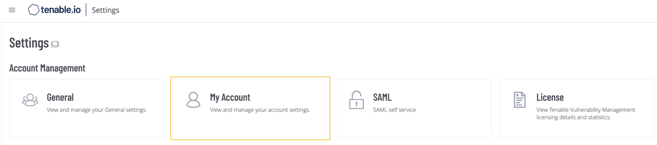
2 - Navigate to the Settings page, then navigate to My Account.
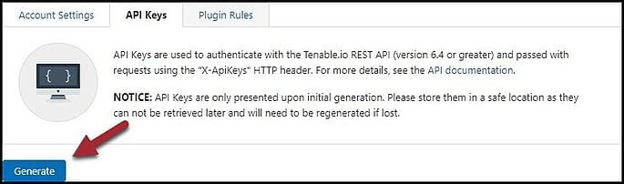
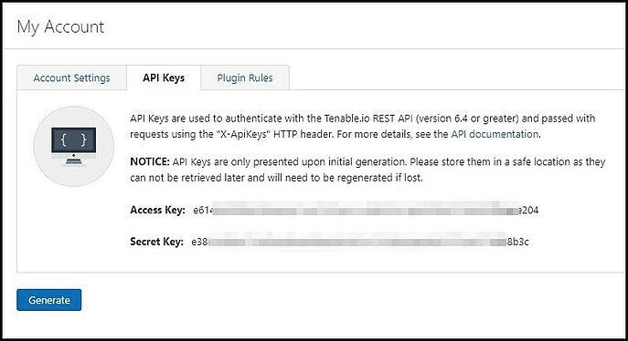
3 - On the My Account page, open the API Keys tab then click the Generate button.
4 - The generated Access Key and Secret Key should appear. Copy and save the keys somewhere safe as they will disappear when you close the page.
6. Integrate Tenable with Autobahn
Upon completing the preparation on Tenable Vulnerability Management side, log into your Autobahn account and navigate to the Integrations page. From there:
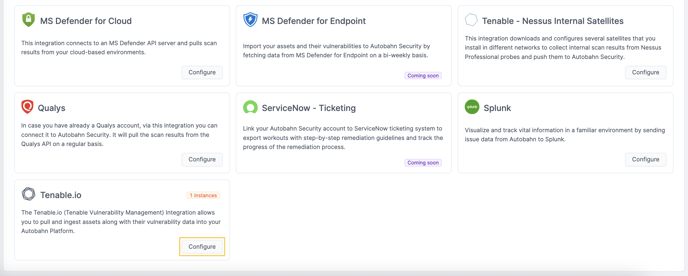
1 - Click the Configure button on the Tenable.io tile.
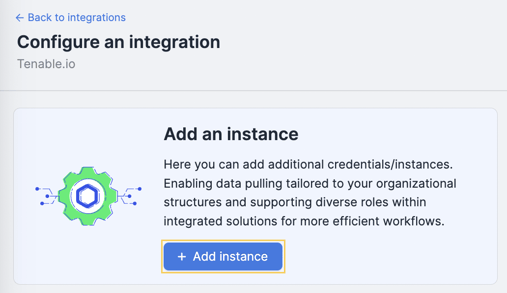
2 - Here, click the + Add instance button to add your instance.
3 - A form to add your credentials will appear.
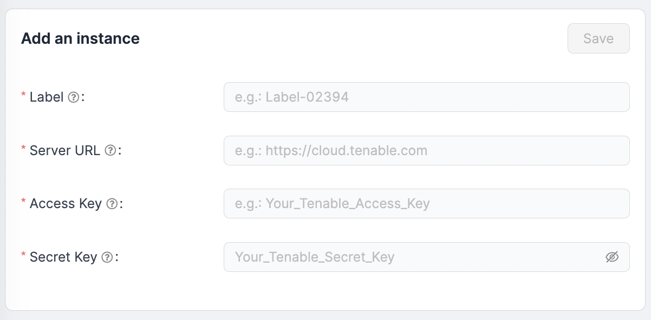
- Label: Label to differentiate different instances, so give it a recognizable name.
- Server URL: The URL you use to open your Tenable Vulnerability Management account.
- Access Key: The access key you previously generated from Tenable Vulnerability Management.
- Secret Key: The secret key you previously generated from Tenable Vulnerability Management.
4 - Once filled, click the Save button to save the instance. It may take a few hours for the integration to fetch the data.
After integrating Tenable Vulnerability Management with Autobahn, it may take a few hours for the data to be fully imported and displayed, depending on the number of assets and vulnerabilities involved.
You can view the imported vulnerabilities on the Issues page by using the Origin filter, and the corresponding assets on the Assets page by using the Source filter.
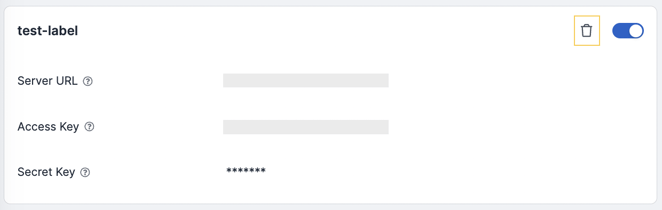
7. Enable/disable an instance
You may want to disable one or more instance(s). Disabling the instance will prevent the Autobahn engine from fetching new data from Tenable Vulnerability Management. The credentials and previously fetched data will remain in Autobahn. To disable the active integration, click the toggle in the instance card.
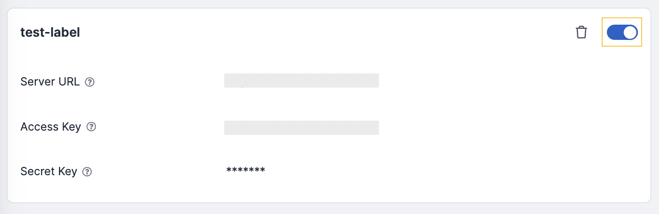
You can re-enable the integration by switching the toggle back. When re-enabled, the Autobahn platform will fetch the data from the last fetching date.
8. Remove an instance
You may want to remove instances from Autobahn. Removing the instance will prevent the Autobahn engine from fetching new data from the removed instance. The previously fetched data will remain in Autobahn.