This tutorial guides you through integrating your Invicti account with the Autobahn platform, enabling you to access actionable insights in a centralized location.
Table of content
- Why integrate Invicti with Autobahn
- Prerequisites to integrate Invicti
- Integrate Invicti account
- View your Invicti data
- Delete Invicti configuration
- Enable or disable Invicti integration
1. Why integrate Invicti with Autobahn
2. Prerequisites to integrate Invicti
To enable the integration, you need to get the:
- User ID of Invicti API
- Token of Invicti API
2.a. Invicti User ID and API
The integration requires an API Key associated with a user account that has the permissions to fetch data. To obtain this Client ID and API Token:
1 - Log into Invicti Enterprise.
2 -Select [Your Name] (top right of the window) and navigate to API Settings.

3 - In the Current Password field, enter your current password.
4 - Select Submit to view the User ID and API Token. Additional details are available at Invicti API Overview documentation.
5 - Copy the User ID and API Token, and paste them onto the Autobahn Integrations page (see instructions in chapter 3 of this guide).

3. Integrate Invicti account
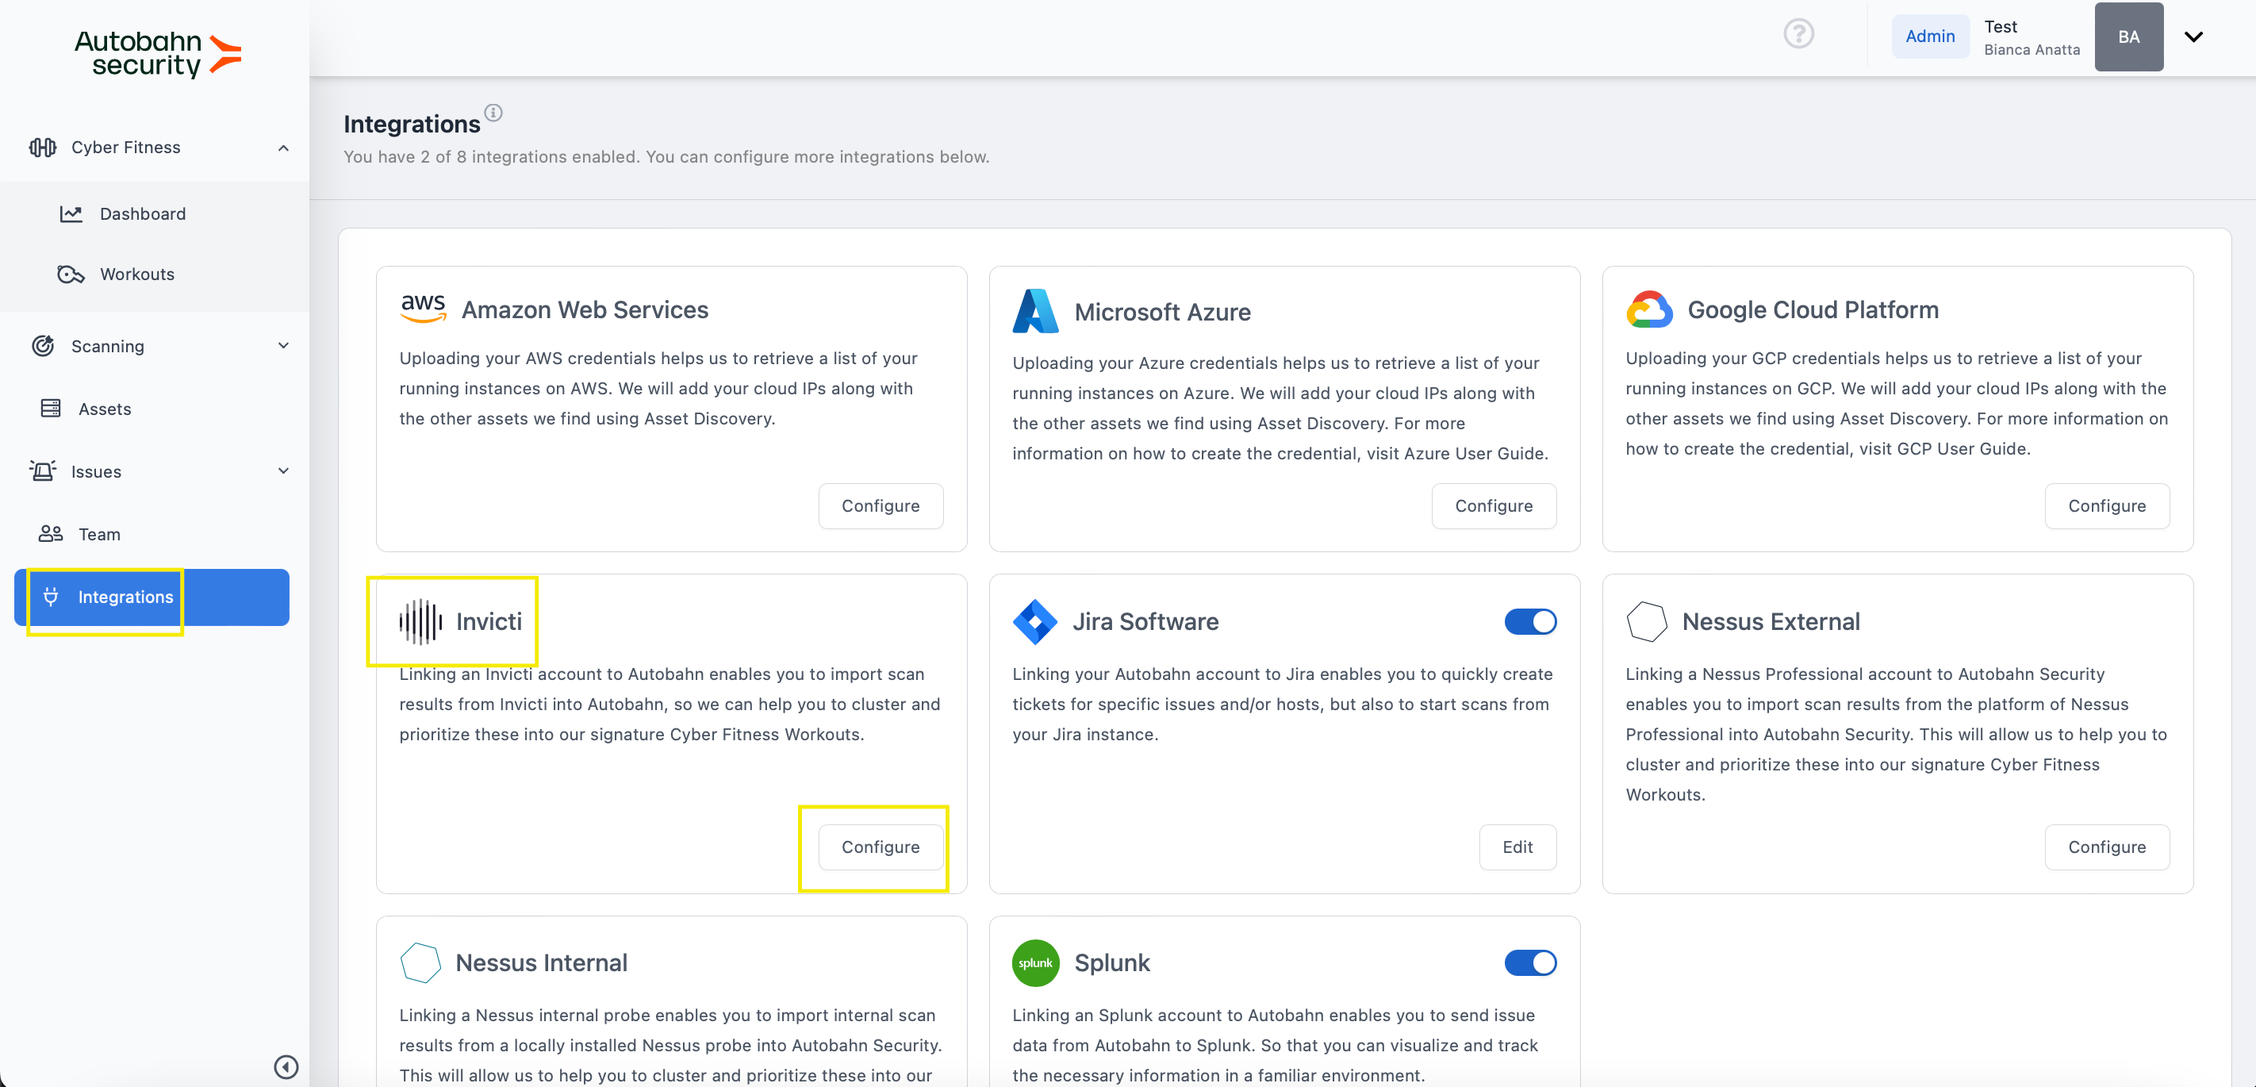
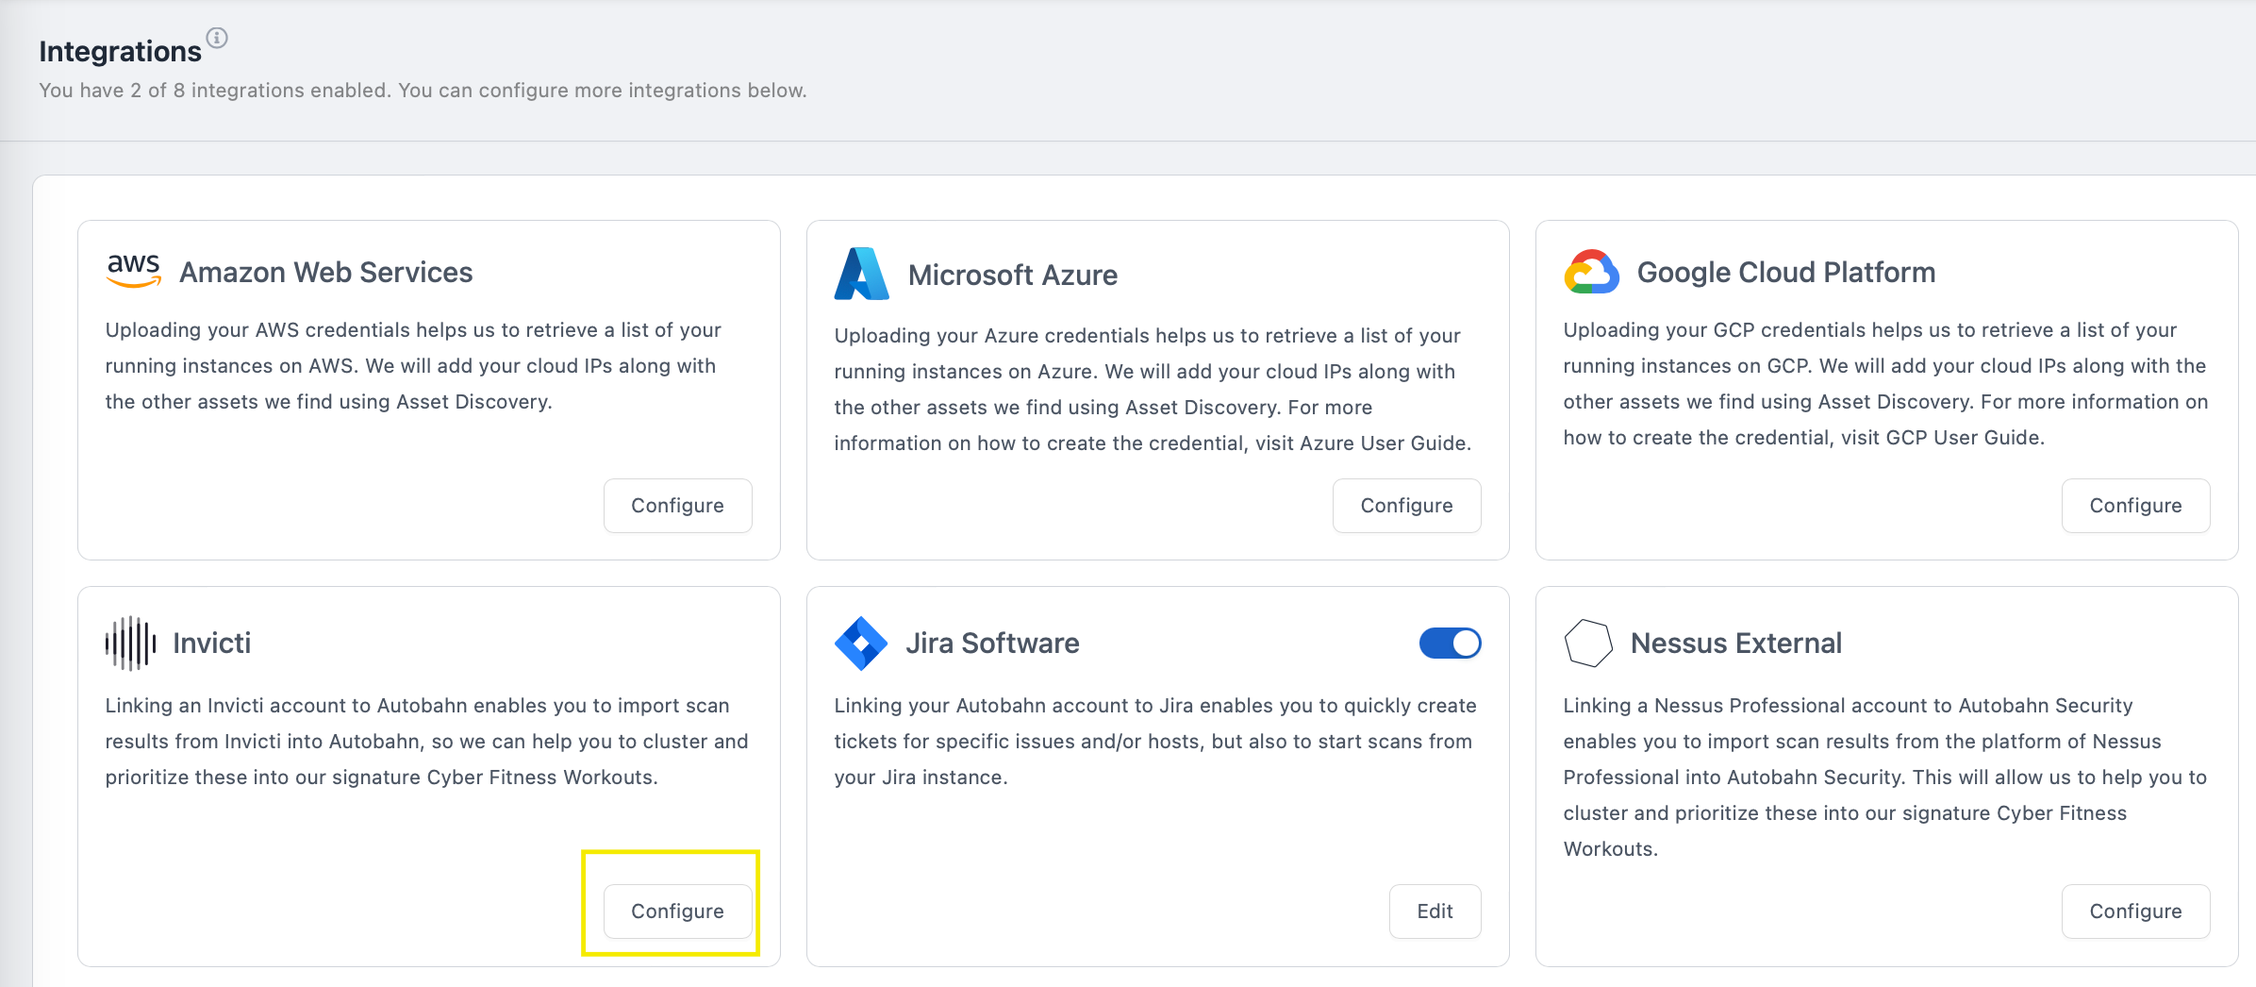
1 - Sign into your Autobahn account and on the side menu, click Integrations. Click on the Configure button on the Invicti card.
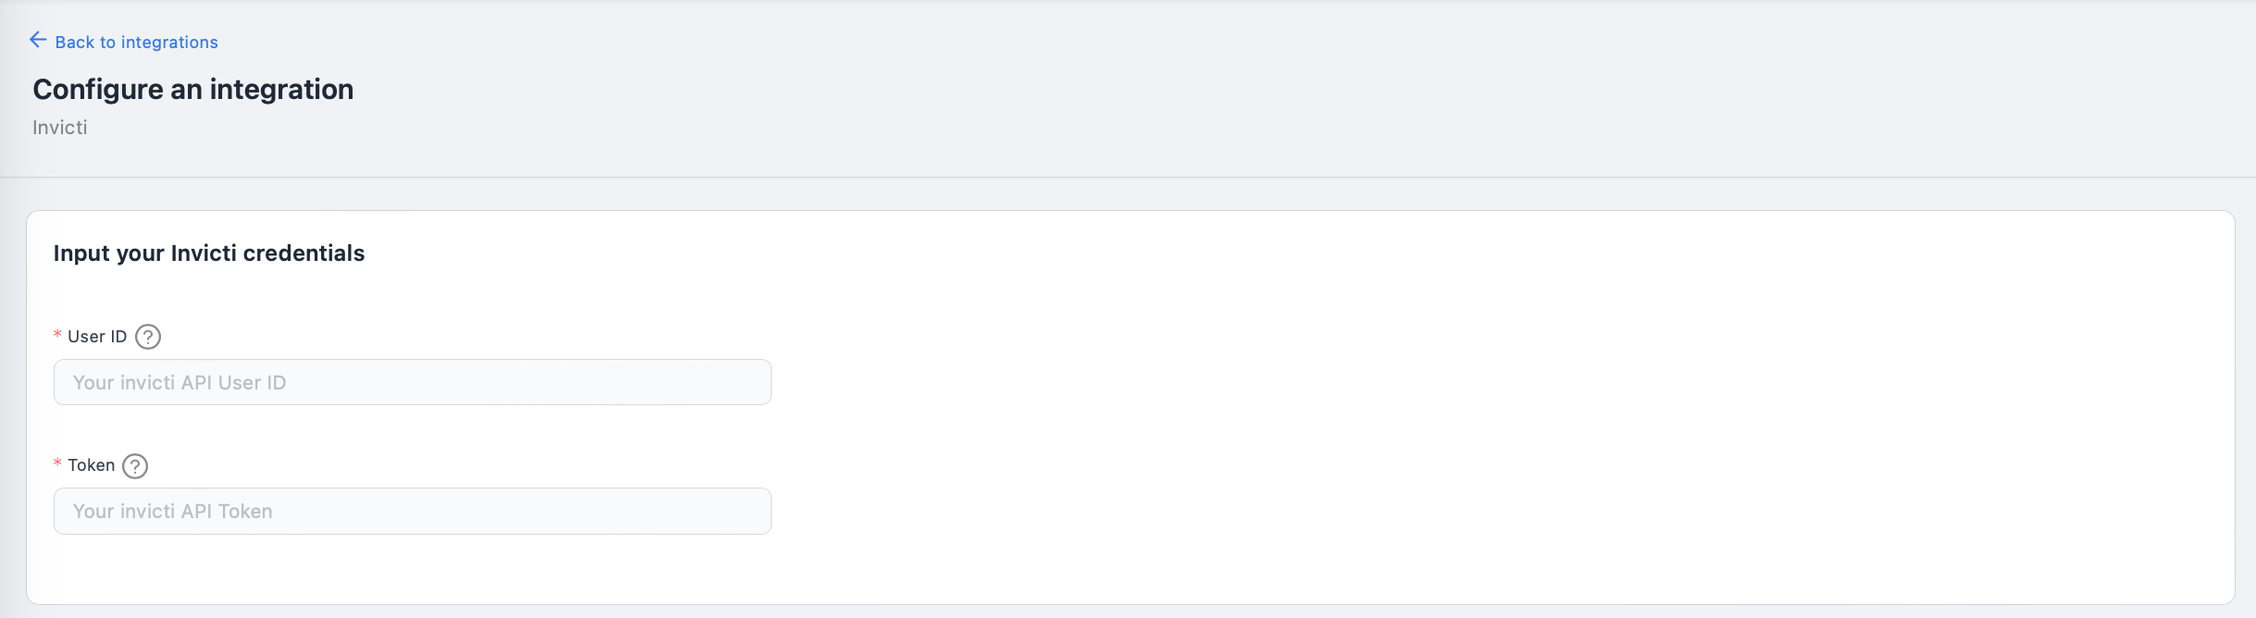
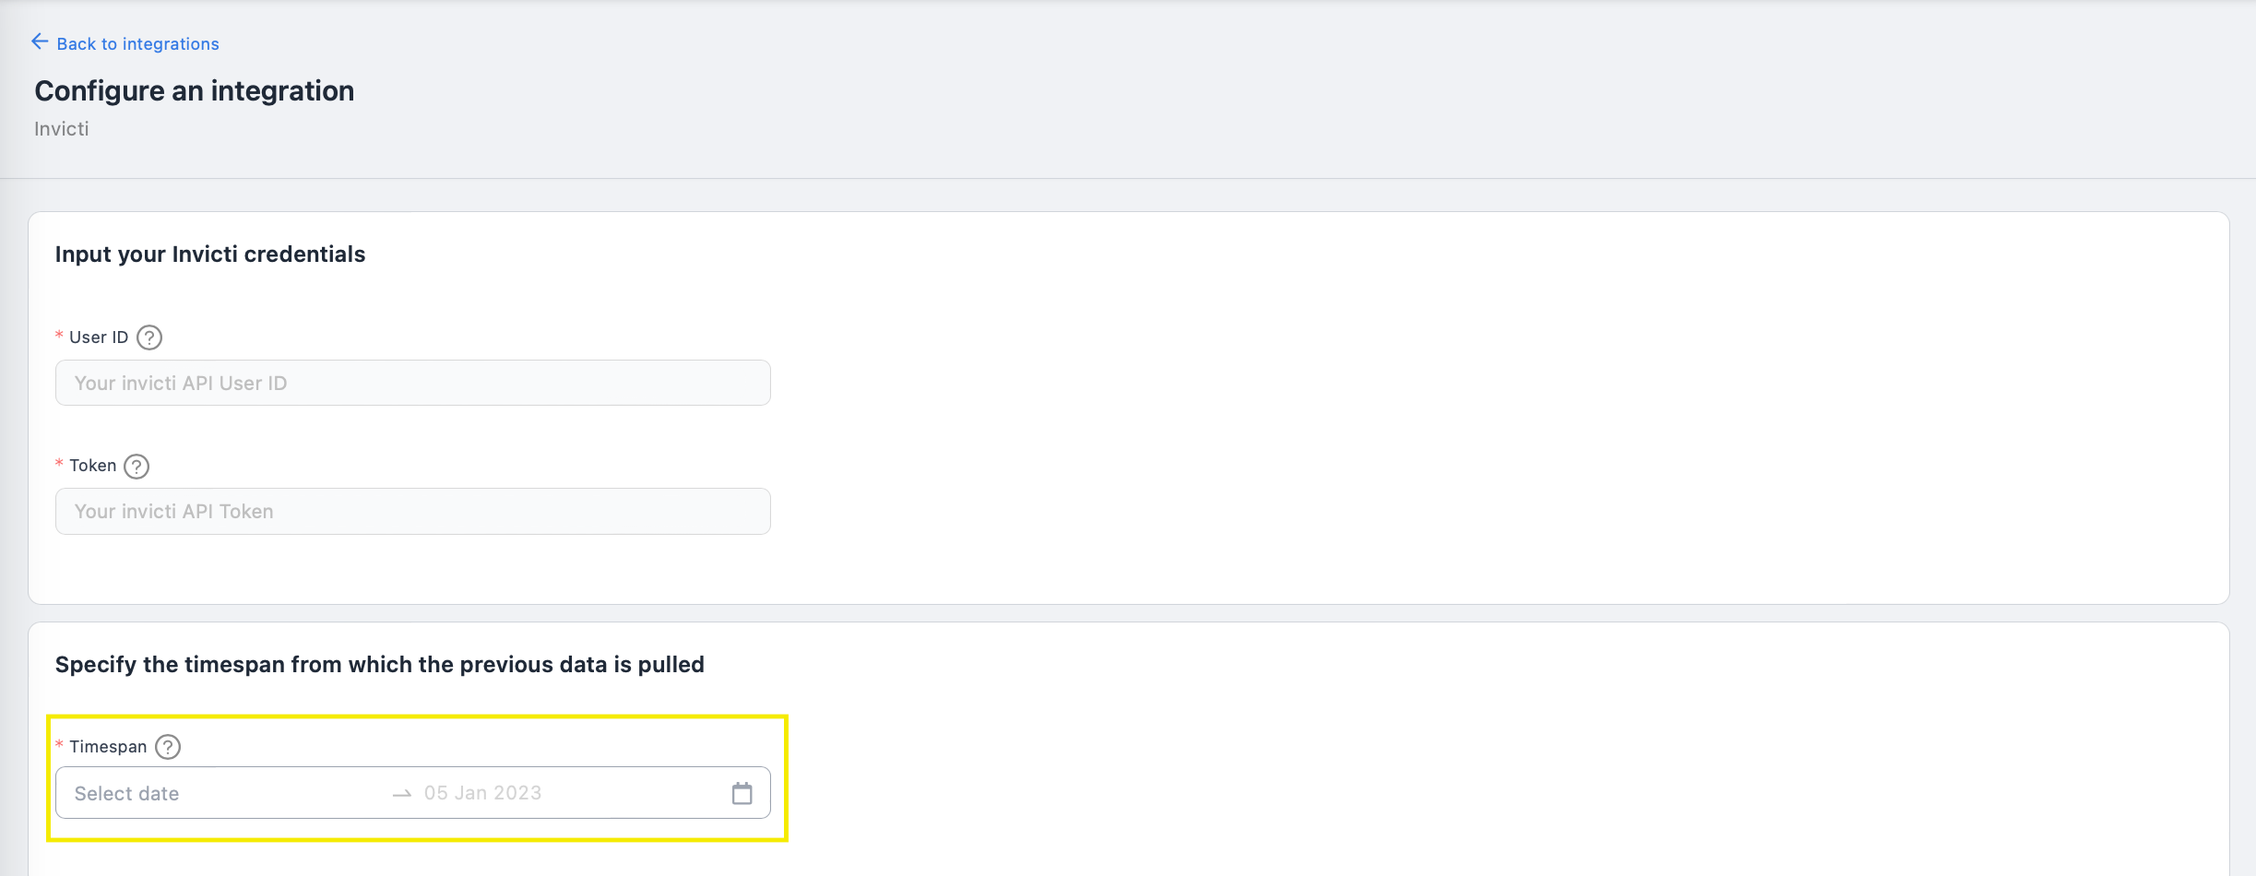
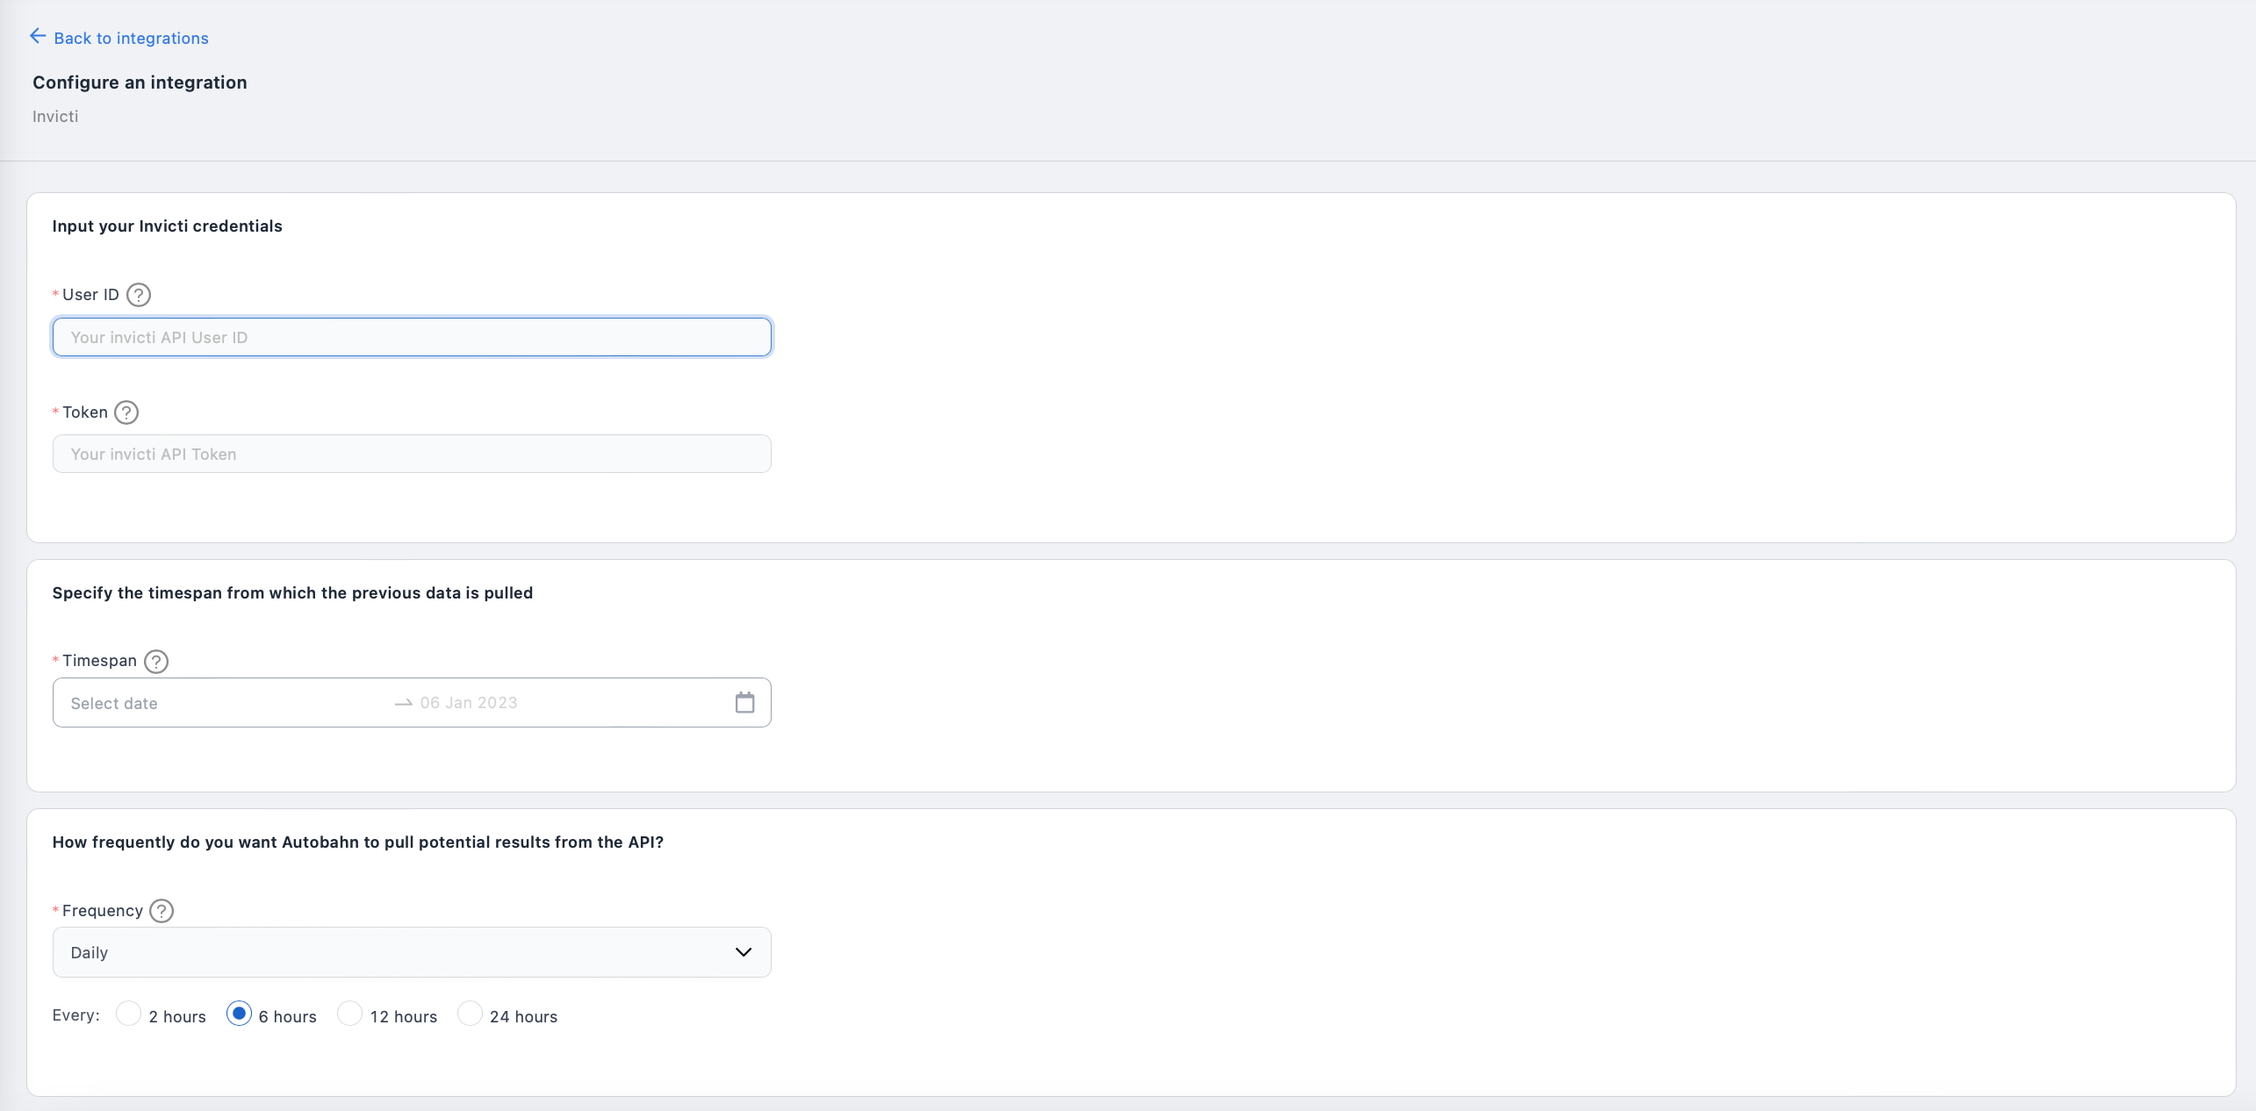
2 - You will be directed to a card asking you to fill in your Invicti credentials. Fill in your Invicti account credentials accordingly.
3 - In the Time Span section, you can define the starting point for importing scan results into the Autobahn platform. Simply select a date to indicate from when the integration should begin pulling data.
4 - Here you should decide on the frequency of how often you want Autobahn to pull data from your Invicti account. This could be daily, weekly, monthly or quarterly.
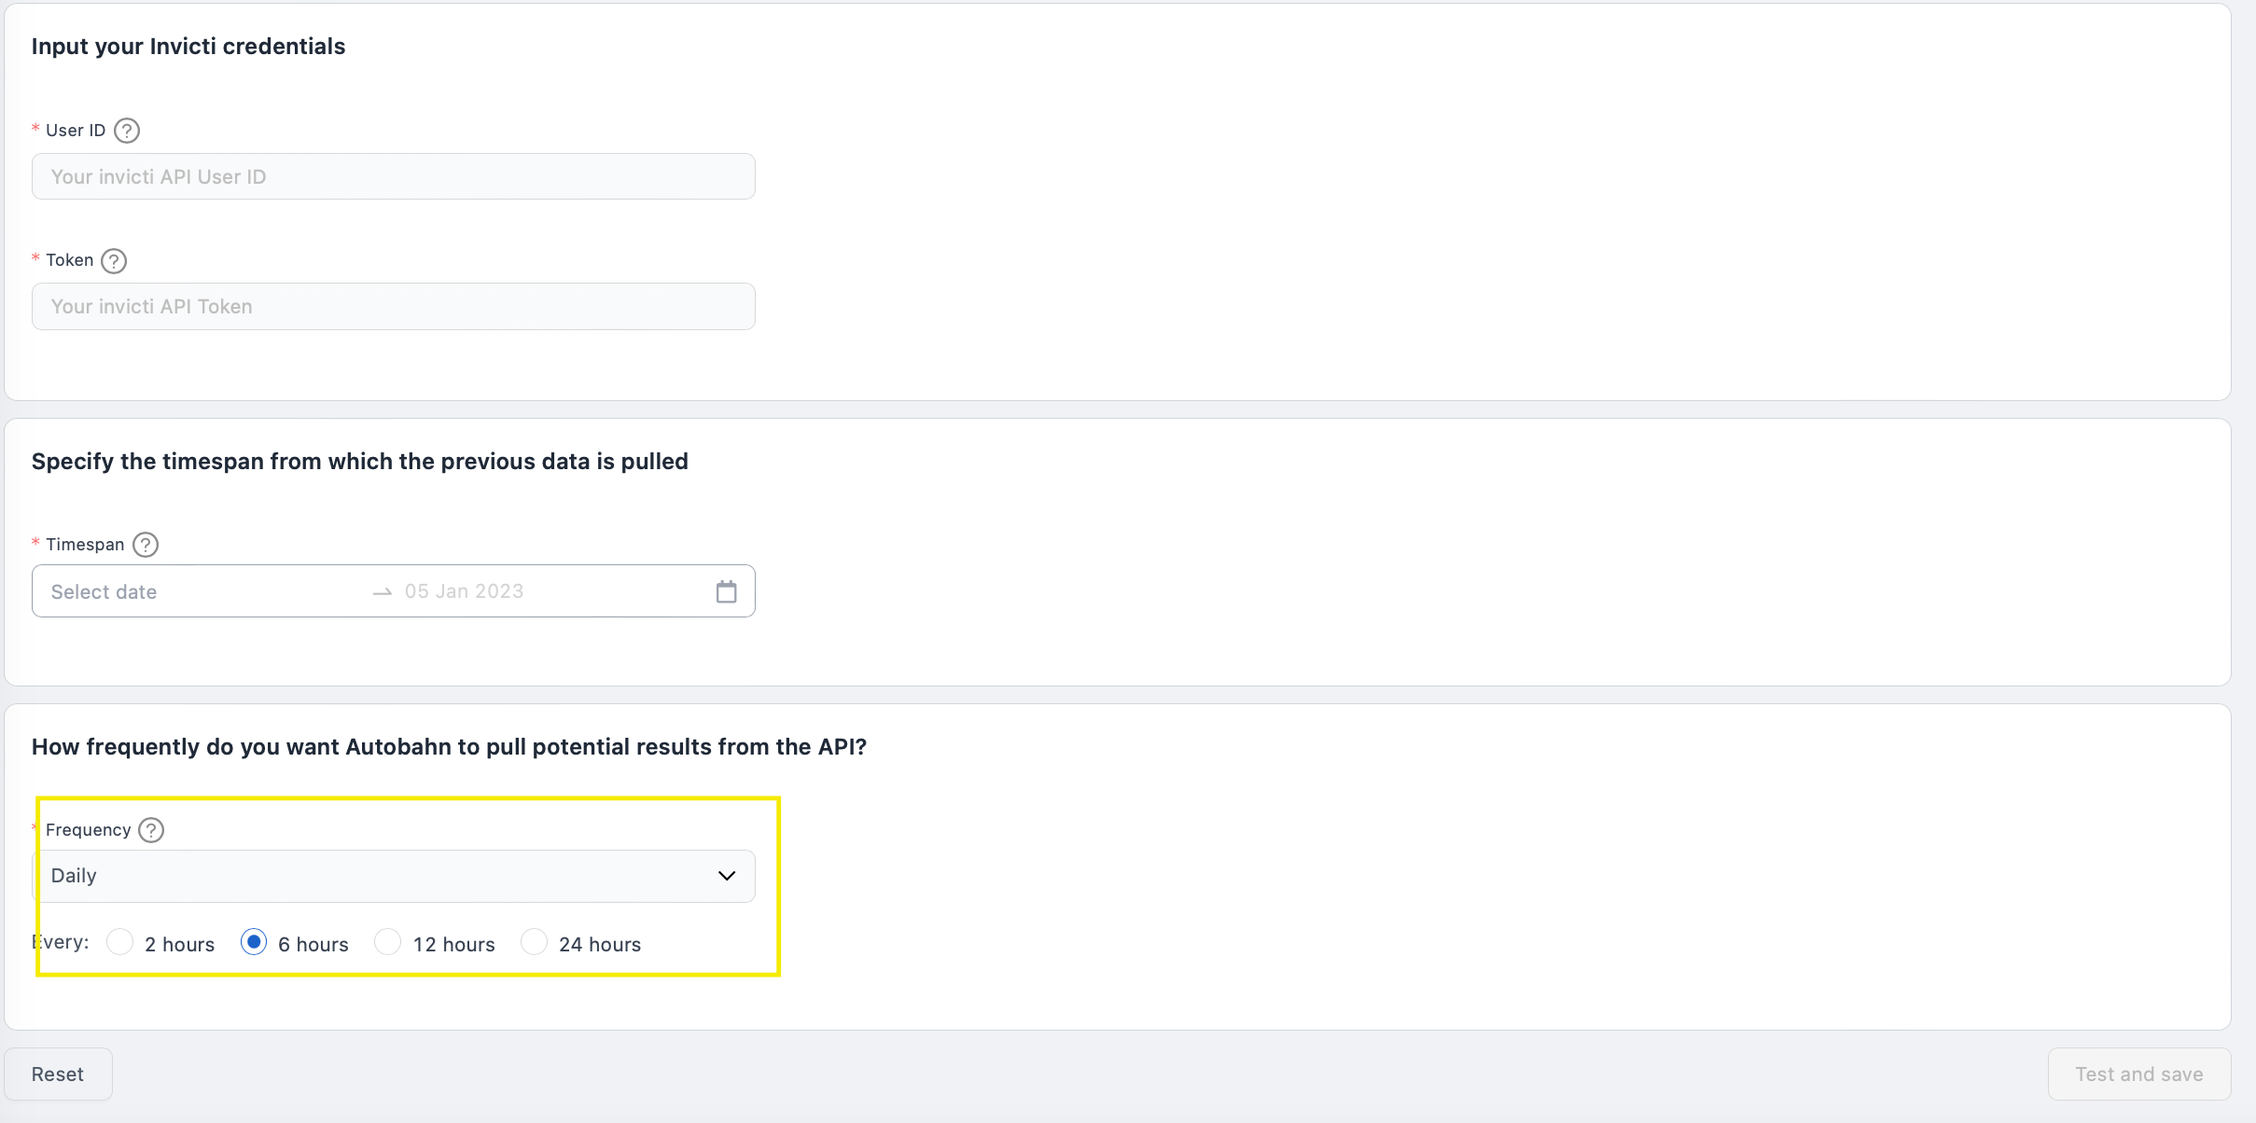
5 - Once you completed the form, the Test and save button on the bottom-right of the page will be activated. Click it to finish setting up the integration with Invicti.
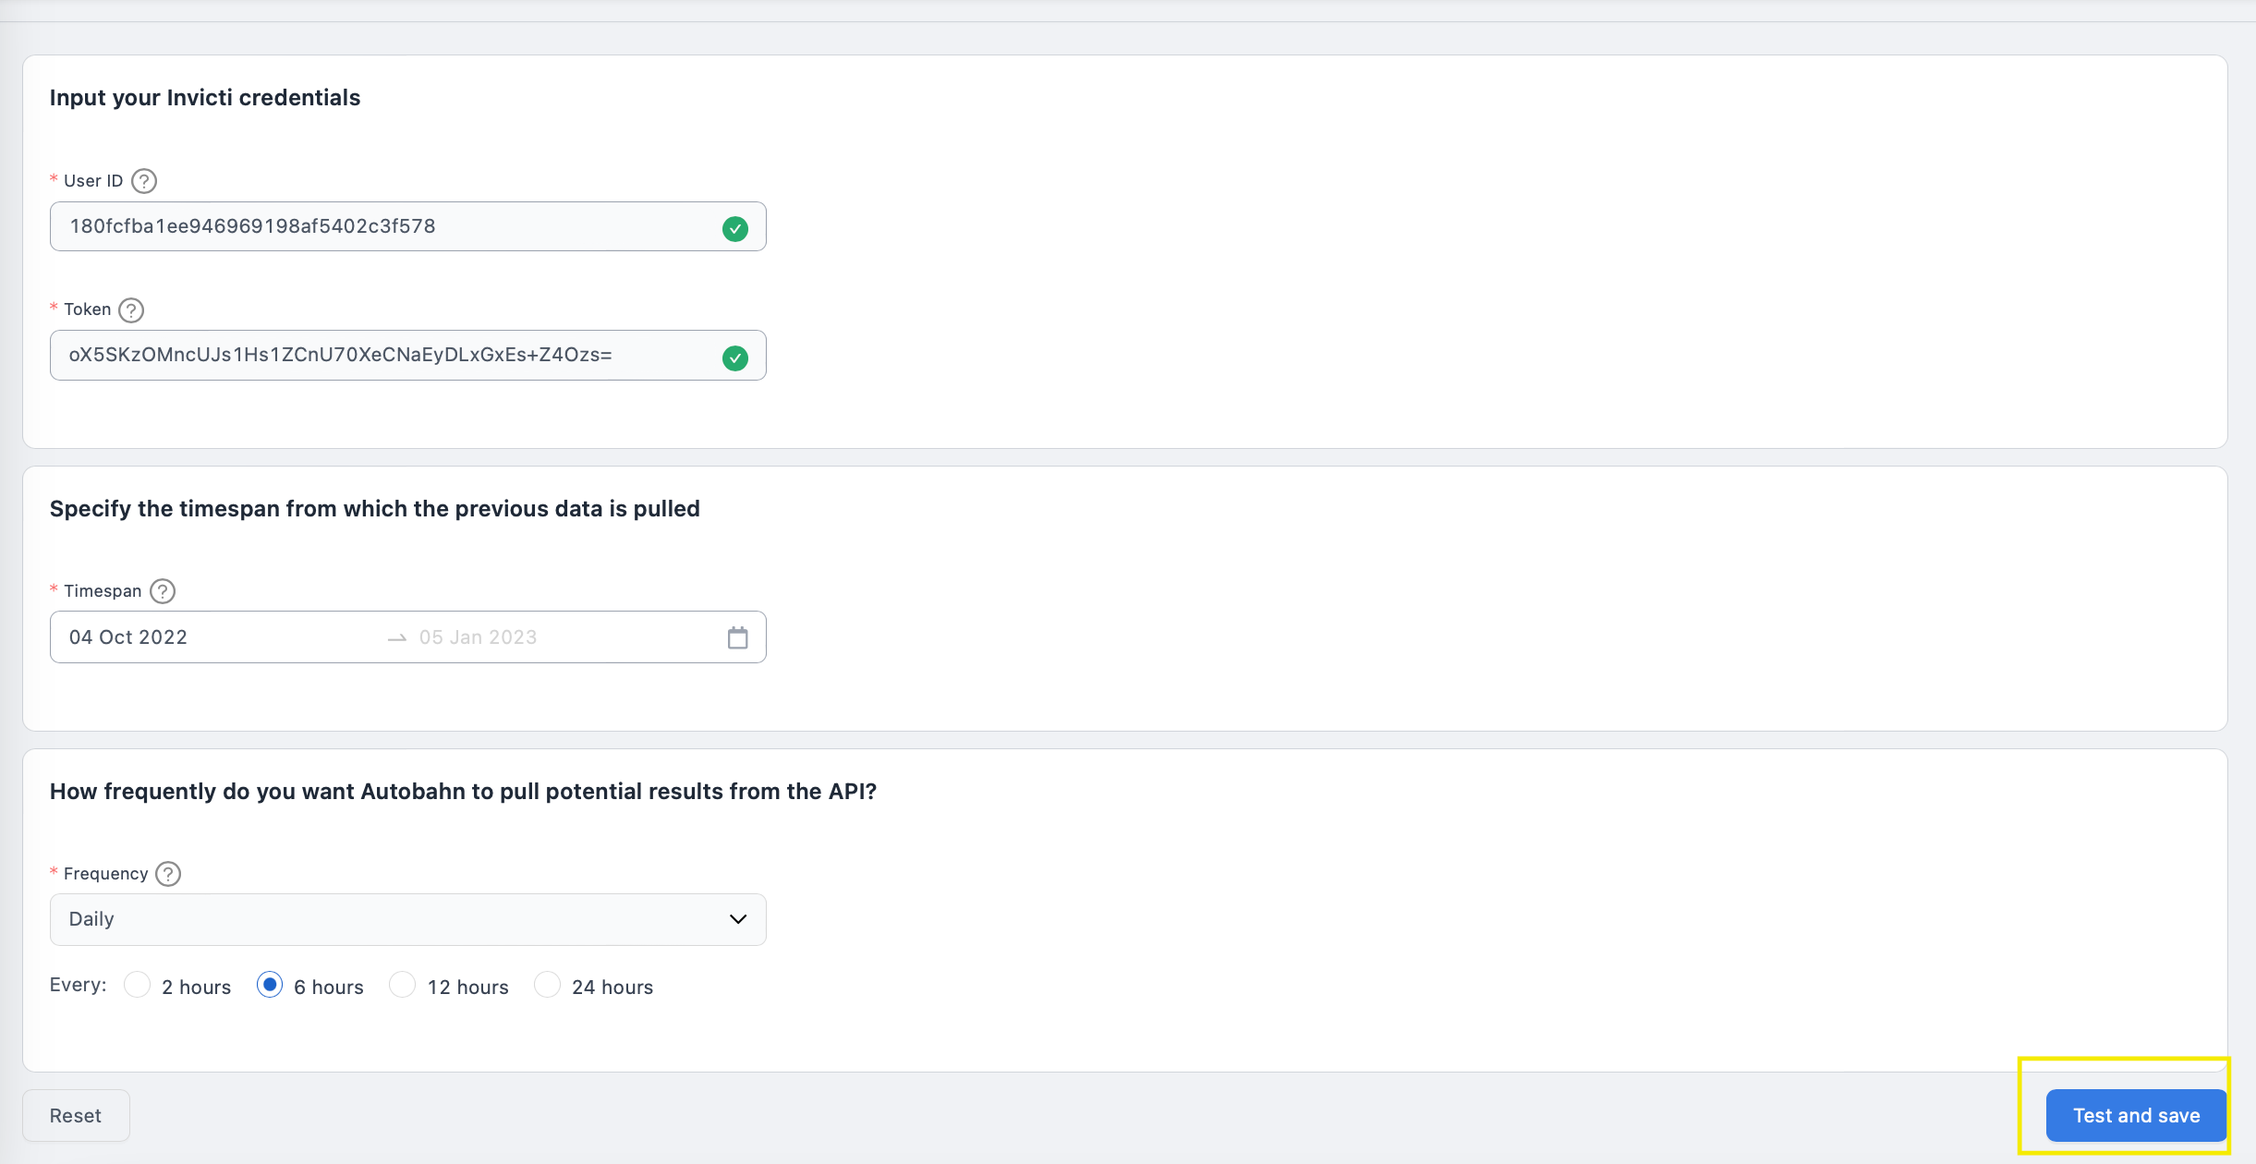
6 - If the credentials are correct, there will be a pop-up notification on the top-right corner of your screen, stating that Invicti has been configured successfully.
Please note that at this point, Autobahn will start fetching your data. This may take a couple of hours until the data is fully visible on the Scanning page. Once everything is processed, you should receive a notification e-mail.
4. View Invicti data
1 - Navigate to the Scanning page in the Autobahn platform and view your scan list. Based on the frequency of data pulled from Invicti, you should see your Invicti scans in the scan list. You can differentiate where scans come from by filtering the Origin column.
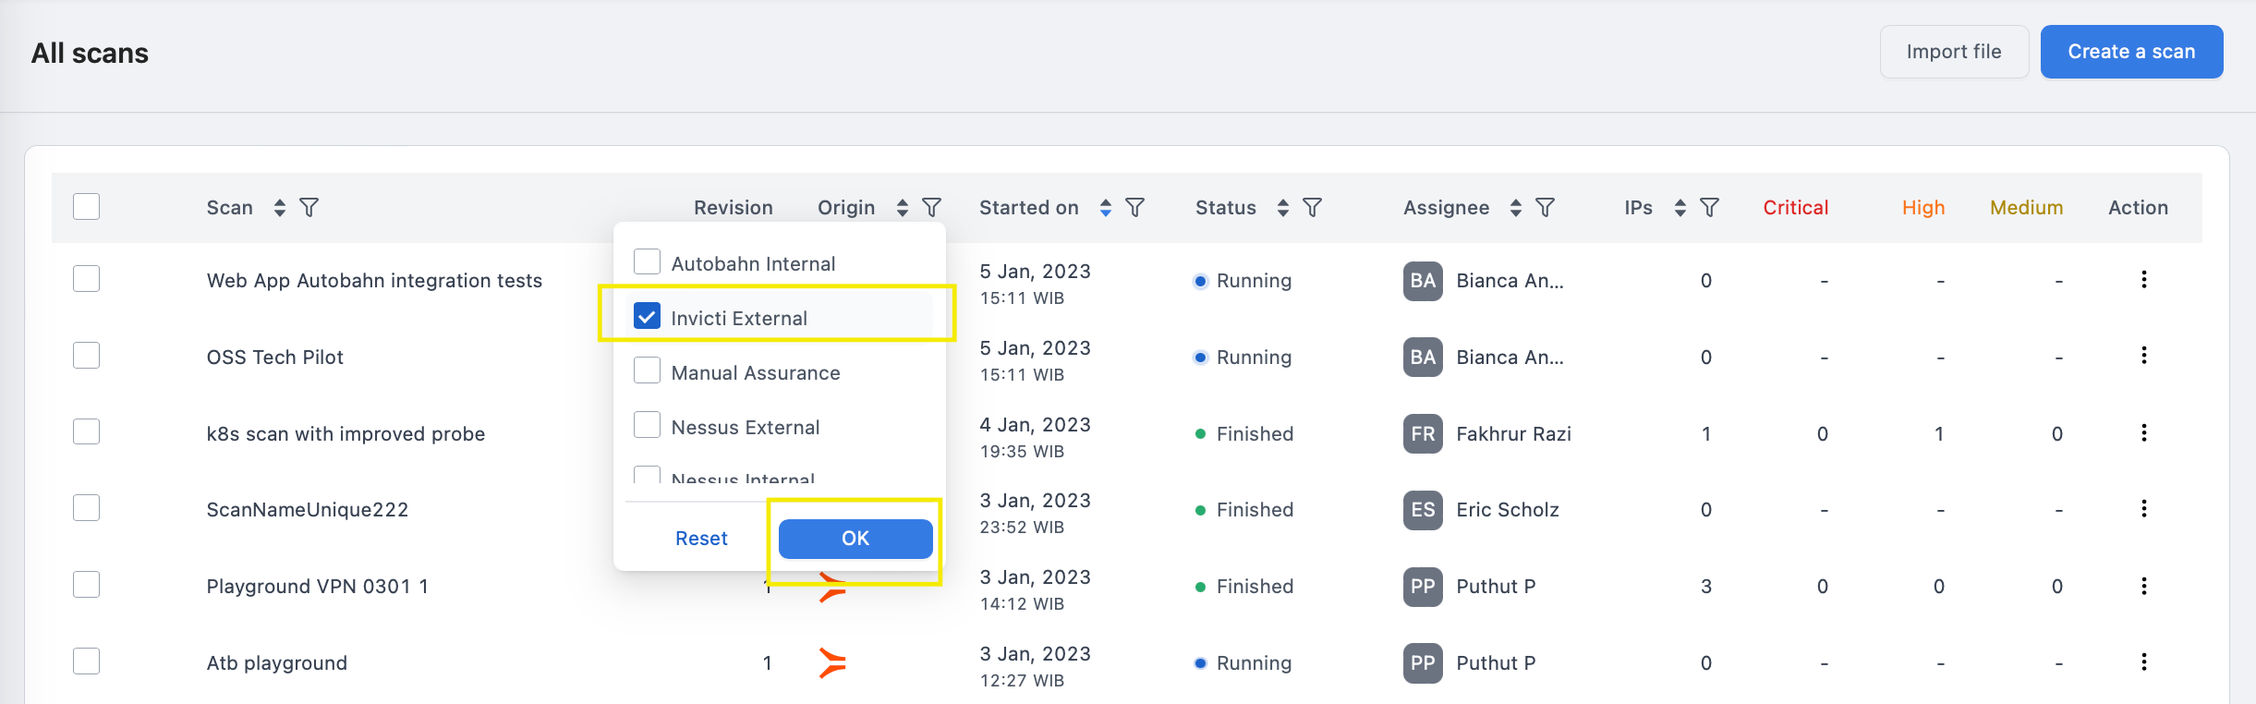
2 - To view the result, click on the scan and you are taken to the Scan report page.
5. Delete Invicti account configuration
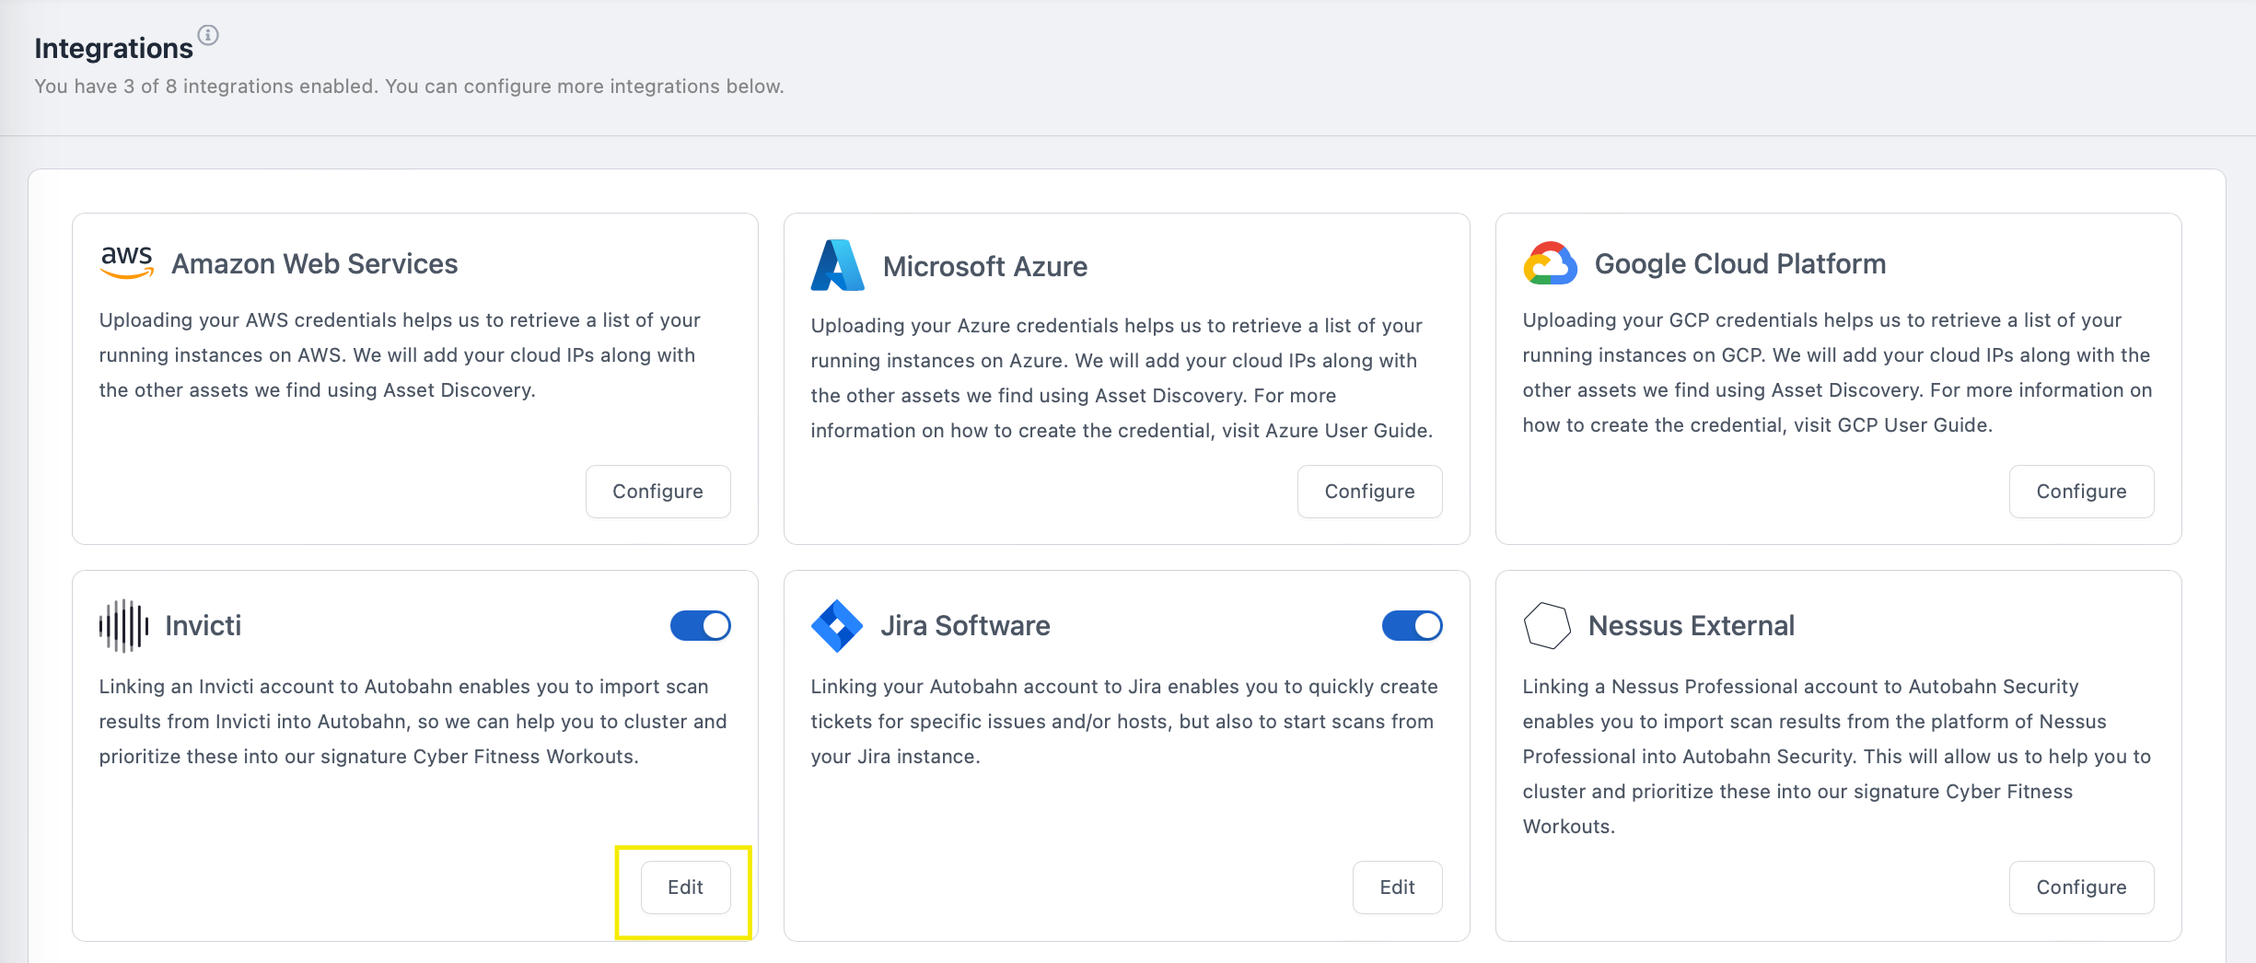
1 - Navigate to Integrations and click Edit on the Invicti tile:
2 - You are redirected to the configuration page. Notice that you are not able to edit the configuration. Click the Delete this configuration button on the bottom-left side of the screen.
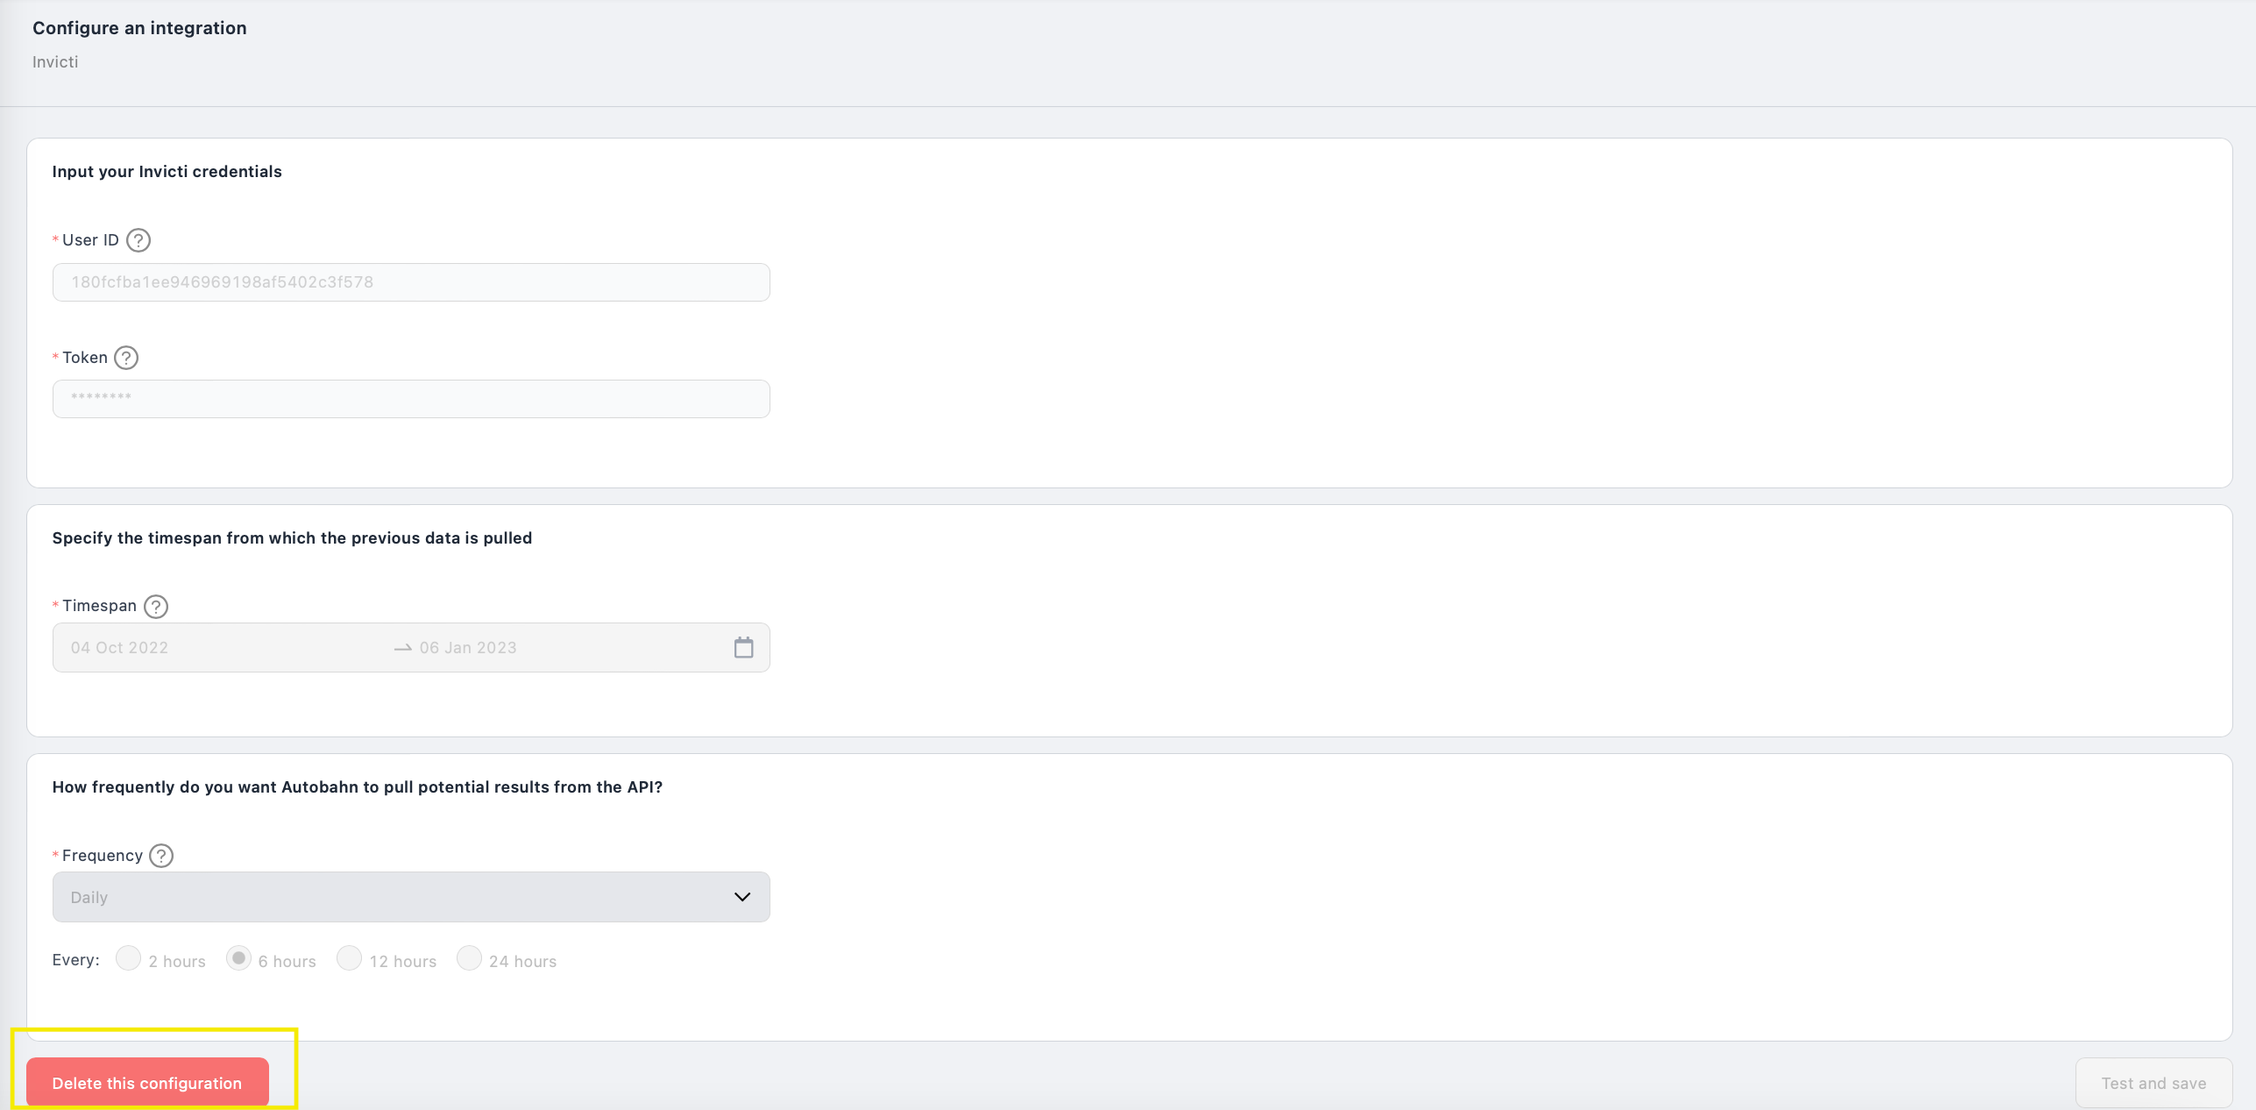
3 - A pop-up on the top-right corner will show, saying that your Invicti configuration has been successfully deleted.

4 - You will be directed to the same configuration page, however this time you are able to fill in the form.
4 - If you go back to the Integrations page, you should see that Invicti is not yet configured.
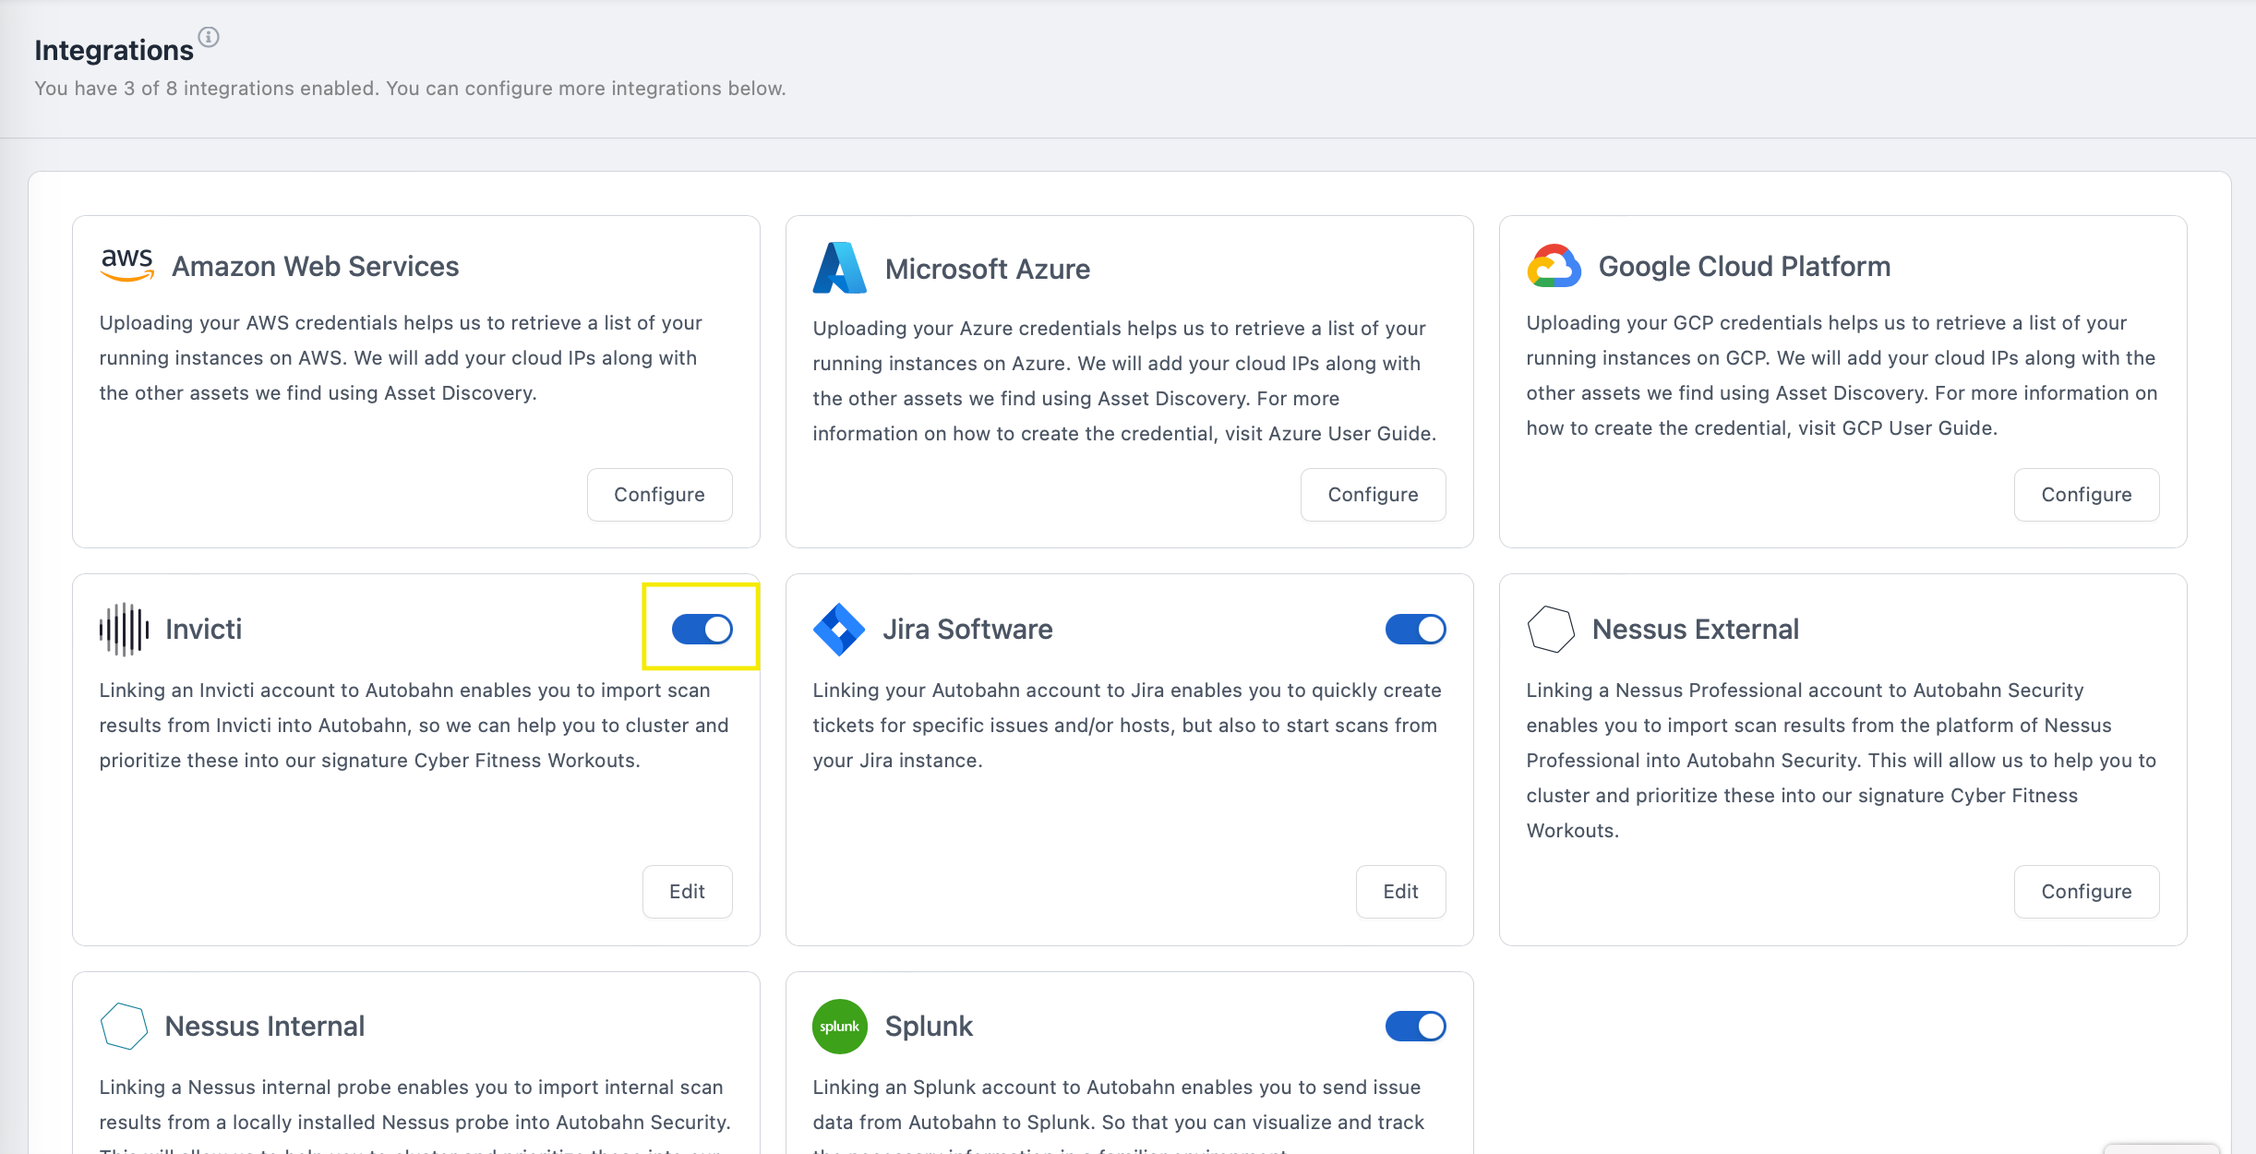
6. Enable or disable Invicti integration
1 - On the Integrations page, navigate to the Invicti card.
2 - Click on the toggle. Note that clicking this toggle when the integration is active does not mean the configuration is cancelled, you rather pause it. You can reactivate the integration by clicking on the toggle again.