Follow this guide to activate single sign-on (SSO) into Autobahn using SAML and GCP
Table of contents
1. SAML SSO with GCP in Autobahn
Google's implementation of Security Assertion Markup Language (SAML) is an open standard that allows the secure exchange of user authentication and authorization data between different systems. This guide will help you generate the necessary credentials within your Google Workspace account to enable Autobahn's single sign-on (SSO).
2. Prerequisites for SAML with GCP
To enable SAML SSO with Google Workspace in Autobahn, you need to provide:
-
Google SAML IDP metadata
-
Google SAML IDP Entity ID
The information above can be generated by configuring Google Workspace as the identity provider (IDP). To configure Google Workspace as your IDP, you need to ensure:
-
Your Google Workspace account is a business account and has administrative privileges in Google Workspace.
-
You need to have a Google Cloud account with permission to create new Google Cloud Projects.
-
You need to have an Admin with Billing permissions to configure an IDP.
Please ask our Customer Success team for the Autobahn Entity ID and ACS URL, you will need this to configure Google Workspace as your IDP.
3. Configure Google Workspace as Identity Provider (IDP)
1 - Navigate to the Google Admin Portal and select Apps.
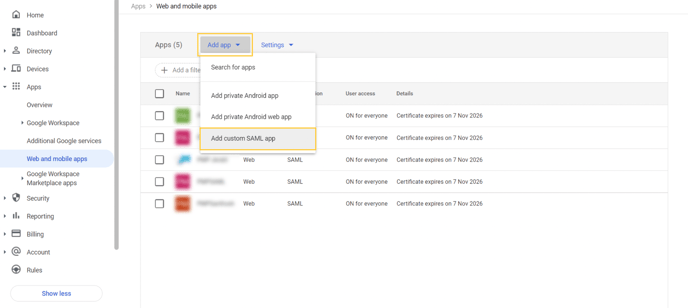
2 - Click on Web and mobile apps -> Add app -> Add custom SAML app from the drop-down Add App menu.

3 - Enter the New Name of App and upload an App icon. Then click Continue.
Collect relevant information
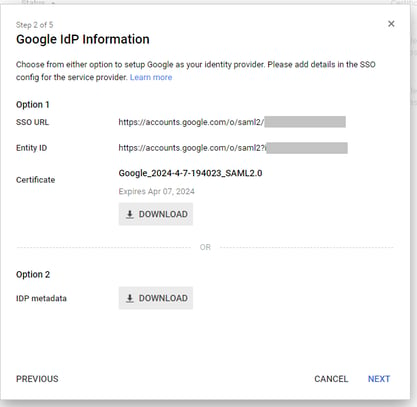
4 - In the Google IDP Information screen download the IDP metadata.
5 - Copy the In the Entity ID field. Both the IDP and Entity ID need to be shared with Autobahn's Customer Success team.

Then click the Next button.
6 - In the Service Provider Details screen, enter the following information:
-
ACS URL:
https://{your_siemplify_server_IP_address}/Saml2/Acs -
Entity ID:
https://{your_siemplify_server_IP_address}/Saml2 -
Then click Next.
7 - In the Attribute Mapping screen, click Add New Mapping. 
8 - Now, you have successfully set up your custom SAML application in G Suite. Please ensure that the Primary email = email.

4. Enable user access
User access is turned OFF for Everyone by default. To turn it on, click User Access, select ON for Everyone, and click SAVE.

5. Test the Login
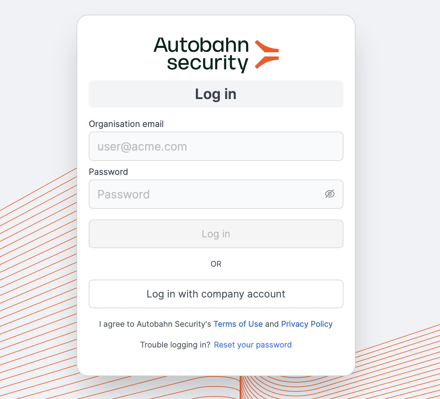
Our customer success team will let you know once the setup is finished. Navigate to the Autobahn login page to test if the SSO is activated.
1 - Click the Login with company account button.

2 - Input your company email and click the login button. Upon successful setup, you will be able to log in seamlessly.

